The Ugly Truth About Poor Installation
Have you ever walked into a room with laminate flooring and noticed uneven planks, gaps between them, or even buckling? It’s an eyesore that can ruin the aesthetic of any room. The sad truth is that many homeowners make common mistakes when laying laminate flooring, leading to these issues.
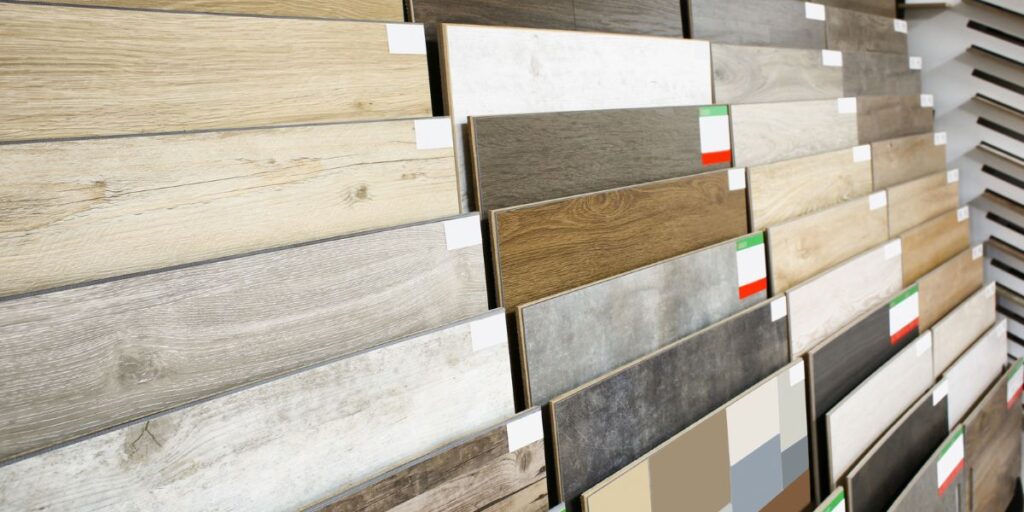
In this article, I’ll be discussing some of the most common mistakes made during installation and how to avoid them for a seamless floor. Laminate flooring has gained popularity in recent years due to its durability, affordability, and versatility.
It’s an excellent option for those who want the look of hardwood without the high cost. However, it’s not just about choosing the right type of laminate flooring; proper installation is key to ensuring it looks and lasts as intended.
The Lowdown on Laminate Flooring
Laminate flooring is a synthetic material made from multiple layers fused together under high pressure. The top layer mimics the look of hardwood or other materials with a photographic image layer that creates the pattern. This top layer is then coated with a protective layer to resist wear and tear from daily use.
One reason laminate flooring has become so popular is due to its durability- it can withstand heavy foot traffic, kids playing on it, and even pets running across it without showing much wear. Additionally, unlike hardwood floors which require regular maintenance such as sanding or coating every few years, laminate floors are relatively low maintenance.
Why Proper Installation Matters
While laminate floors are known for being durable and easy to install compared to traditional hardwood floors, you can’t just slap down your new floor without proper planning beforehand. Improper installation leads to your floor looking wavy or even uneven, which can cause problems down the road, like tripping hazards. Additionally, a poor installation job may impact the durability of the flooring itself and could cause it to need repairs sooner than expected.
Laminate flooring is a floating floor, which means that it’s not glued or nailed down to the subfloor. Instead, it “floats” above the subfloor using an interlocking system that connects each plank together. While this makes installation easier, there are critical steps that must be taken to ensure proper installation and avoid common mistakes. In the following sections, we’ll dive into some major mistakes you should avoid when installing laminate floors!
RELATED: Step Up Your Flooring Game: Exploring the Modern World of Flooring Services
The Importance of Acclimation
Acclimating your laminate flooring is one of the most important steps in ensuring a successful installation. Neglecting this step may result in a warped or damaged floor and, ultimately, wasted time and money. You may be wondering why acclimation is so crucial.
Well, let me tell you – laminate flooring is made up of layers of wood, which can expand or contract due to changes in temperature and humidity. Acclimation allows the planks to adjust to the environment they will be installed, reducing the risk of buckling or warping.
Why People Skip It
So why do people skip this crucial step? Laziness?
Ignorance? Whatever the reason may be, it’s unacceptable.
I’ve heard countless horror stories of people who skipped acclimation and ended up with floors that looked like an uneven rollercoaster ride. It baffles me that people would risk ruining an expensive investment just to save a bit of time.
Tips for Proper Acclimation
Now that we’ve established how important acclimating your laminate flooring is, let’s talk about some tips for doing it correctly. First off, make sure you have enough time to properly acclimate your planks – typically, anywhere from 48-72 hours is recommended. Keep the planks in a room that has similar temperature and humidity conditions as where they will be installed.
It’s also important to keep the planks flat during acclimation – stacking them on top of each other can cause them to warp or bend. Make sure you remove any plastic wrapping from the boxes before beginning acclimation – leaving them wrapped can trap moisture inside and affect their ability to adjust properly.
Remember, folks, taking shortcuts during installation will only lead to headaches down the road. Take your time and do things right – trust me, your flooring will thank you for it.
The Importance of Preparing Your Subfloor Before Installing Laminate Flooring
Common Subfloor Issues and How They Can Affect Installation
Let’s be honest: the subfloor is the unsung hero of laminate flooring. It’s the foundation upon which everything else rests, and yet so many people don’t give it the attention it deserves. You can have the best quality laminate flooring on the market, but if your subfloor isn’t properly prepared, you’re setting yourself up for disaster.
One common issue with subfloors is unevenness. This can be caused by a variety of factors, including settling or shifting of the home’s foundation or framing issues during construction.
If your subfloor is uneven, it can cause your laminate planks to shift or buckle over time, ruining the look and functionality of your flooring. Another major issue with subfloors is moisture.
If there’s excessive moisture in your subfloor, it can seep up into your laminate planks and cause them to warp or even rot over time. This can not only ruin the appearance of your floors but also create a potential safety hazard in your home.
Tips for Preparing Your Subfloor
So what can you do to avoid these issues? It all starts with proper preparation.
First and foremost, you need to ensure that your subfloor is level before installing any laminate flooring. Use a straight edge or level to check for any high or low spots on the surface; if you find any, you’ll need to sand them down or fill them in with a leveling compound.
You should also test for moisture levels in your subfloor before installation. A simple moisture meter from a hardware store will help you determine if there’s too much moisture present; if there is, use a dehumidifier to dry out the space before installing any laminate planks.
Be sure to clean your subfloor thoroughly before installation. Any dust, debris, or other particles left on the surface can cause the adhesive used to install your laminate planks to fail.
Use a vacuum or broom to sweep away any dirt and debris, and use a damp mop to clean the surface thoroughly. Don’t let your subfloor be an afterthought when it comes to installing laminate flooring.
Proper preparation is key to ensuring that your floors stay beautiful and functional for years to come. Take the time to address any issues with your subfloor before installation, and you’ll be rewarded with flooring that looks great and performs well over time.
The Importance of Underlayment for Laminate Flooring
When it comes to installing laminate flooring, many people may not realize the importance of underlayment. Some may even choose to skip this crucial step altogether, thinking that it’s an unnecessary expense or an extra hassle. However, let me tell you from experience: skipping underlayment is a huge mistake that can lead to costly and time-consuming problems down the line.
So what exactly is underlayment, and why is it so important? Essentially, underlayment is a thin layer of material that sits between your subfloor and your laminate flooring.
Its primary purpose is to provide a smooth, stable surface for your planks to rest on. Without underlayment, even minor imperfections in your subfloor could cause noticeable bumps or dips in your finished floor.
But that’s not all – underlayment also helps with sound reduction and insulation. If you’ve ever walked on a laminate floor without any kind of padding underneath, you’ll know how loud and hollow it can sound.
Underlayment helps to dampen that noise and create a more pleasant walking experience. Additionally, some types of underlayment have insulating properties that can help keep your home warmer in the winter and cooler in the summer.
Choosing the Right Type of Underlayment
Now that we’ve established why underlayment is so important let’s talk about choosing the right type for your project. There are several different materials commonly used for this purpose:
Foam Underlayment
Foam underlayments are among the most popular choices for laminate flooring installation because they’re affordable and easy to work with. They come in various thicknesses and densities – thicker foam will generally provide better sound reduction but may be more expensive.
Cork Underlayment
Cork is another popular choice for underlayment, as it has excellent sound-deadening properties and is eco-friendly. However, it’s usually more expensive than foam and can be harder to find.
Felt Underlayment
Felt underlayments are typically made from recycled fibers and provide decent sound reduction. They’re a good choice if you’re looking for a more environmentally friendly option.
When it comes to choosing the right type of underlayment for your project, consider factors such as your budget, the level of sound reduction you require, and any environmental concerns you may have. With the right underlayment in place, your laminate flooring installation will be smoother and more successful – trust me on this one!
The Importance of Expansion Space in Laminate Flooring Installation
Laminate flooring is a popular choice for many homeowners due to its durability, affordability, and ease of installation. However, one of the most common mistakes made during installation is not leaving enough space for expansion. The fact that this issue persists is mind-boggling to me.
It’s like people don’t understand the basic principles of physics – everything expands when it heats up! And make no mistake about it, laminate flooring will expand and contract depending on the temperature and humidity levels in your home.
Why is expansion space necessary? Well, consider this: if you lay your laminate floor too tightly against the walls or other obstacles, there won’t be enough room for the planks to expand when they inevitably need to.
This can cause all sorts of problems down the line, such as buckling or warping. And let me tell you, repairing these issues after installation is a nightmare.
Not only will you have to replace damaged planks, but you’ll also have to address any underlying issues, such as moisture damage or subfloor problems. So how do you determine how much space to leave?
As a rule of thumb, it’s recommended that you leave at least a 1/4 inch gap between the laminate flooring and any vertical obstacles, such as walls or cabinets. This allows enough room for expansion without compromising the integrity of your installation.
Additionally, if your room measures more than 30 feet in length or width, then be sure to leave an additional 1/8 inch gap every 30 feet. Don’t worry about these gaps being unsightly – they’ll be covered by baseboards and other moldings once installed.
How To Determine Proper Expansion Gap
Now that we’ve established why expansion space is necessary, let’s delve into how exactly you can determine what size gap should be left during installation. Firstly, consider the size and shape of your room.
If it’s relatively small or square-shaped, then a 1/4-inch gap should suffice. However, if you’re installing in a larger or more irregularly shaped room, then you’ll need to take additional factors into account.
For instance, consider the ambient humidity levels in your home. If you live in an area with high humidity levels, then your laminate flooring will be more prone to expansion.
In this case, you may want to leave a slightly larger gap than usual. Another factor to consider is whether your subfloor is made of wood or concrete.
Wood subfloors tend to expand and contract more than concrete ones due to changes in temperature and humidity. Therefore, it’s recommended that you leave a larger expansion gap when installing over a wood subfloor.
Pay attention to the manufacturer’s recommendations for expansion gaps. Different brands and styles of laminate flooring may have slightly different requirements for expansion space during installation.
Conclusion: Don’t Make This Critical Error!
Not leaving enough space for expansion during laminate flooring installation is one of the most critical errors you can make. It can lead to all sorts of problems down the line, such as buckling and warping, which are costly and time-consuming issues to fix. To ensure that your installation runs smoothly and lasts for years without any issues, be sure to leave adequate expansion space around obstacles such as walls and cabinets.
And don’t forget to take into account other factors, such as room size, humidity levels, and subfloor type, when determining how much space is necessary. Trust me on this – taking the time now to properly plan and execute your laminate flooring installation will save you from headaches later on!
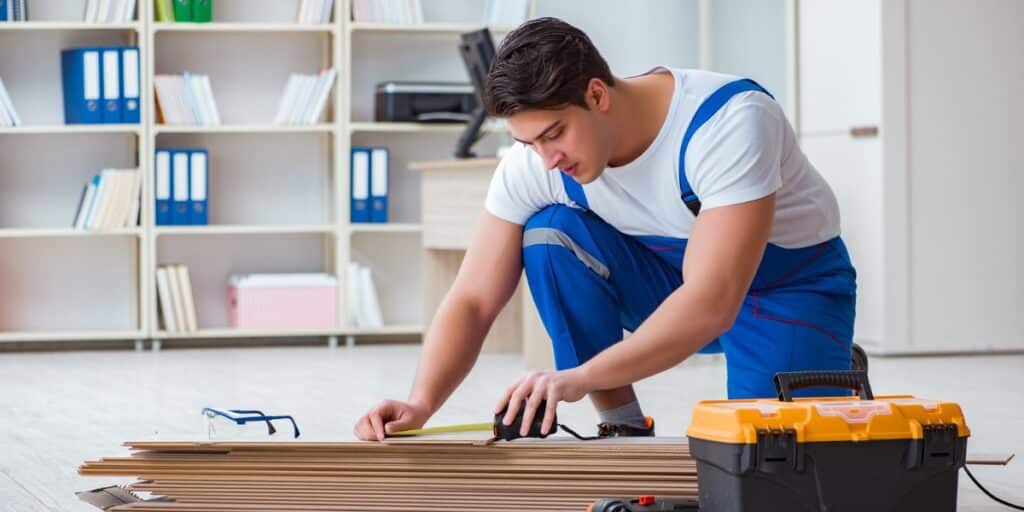
The Importance of Accurate Measuring and Cutting
When it comes to laying the laminate flooring, few things are more important than measuring and cutting your planks accurately. Unfortunately, many inexperienced DIYers make the mistake of rushing through this step in their haste to complete the project. But trust me, taking shortcuts on measurement and cutting is a recipe for disaster.
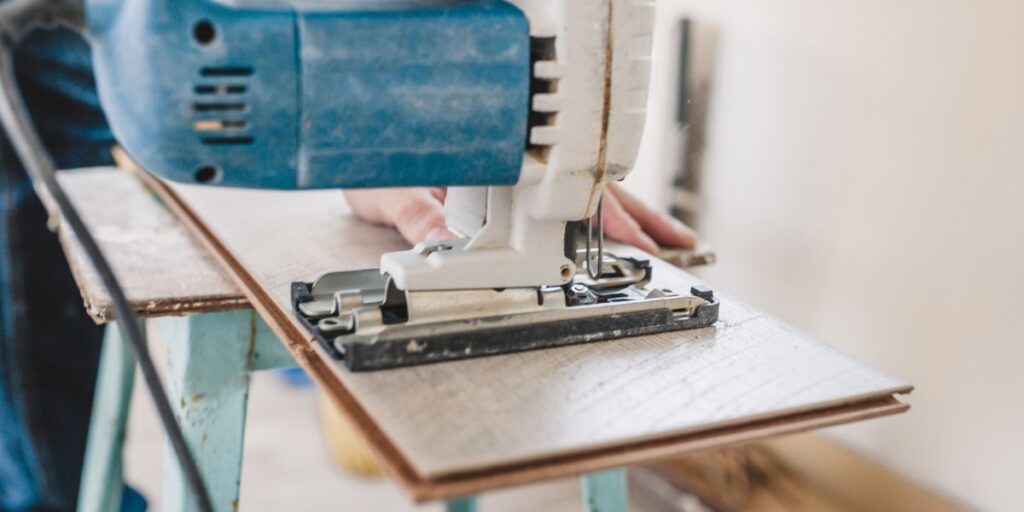
Common Mistakes When Cutting Planks
One of the most common mistakes people make when cutting laminate flooring planks is failing to use a proper saw blade. Many people assume that any old saw will do, but this couldn’t be further from the truth. Using a saw blade that’s not designed for laminate can result in uneven cuts or even damage to the plank itself.
Another common error is using a dull saw blade. This can be just as detrimental as using the wrong kind of blade since it can result in splintering or jagged edges on your planks.
Always make sure your saw blade is sharp before you start cutting. Many DIYers fail to account for the width of their saw blade when making cuts.
The width of your saw blade means that you’ll lose some material every time you make a cut – typically around 1/8th inch. If you don’t factor this into your measurements, you could end up with gaps between your planks over time.
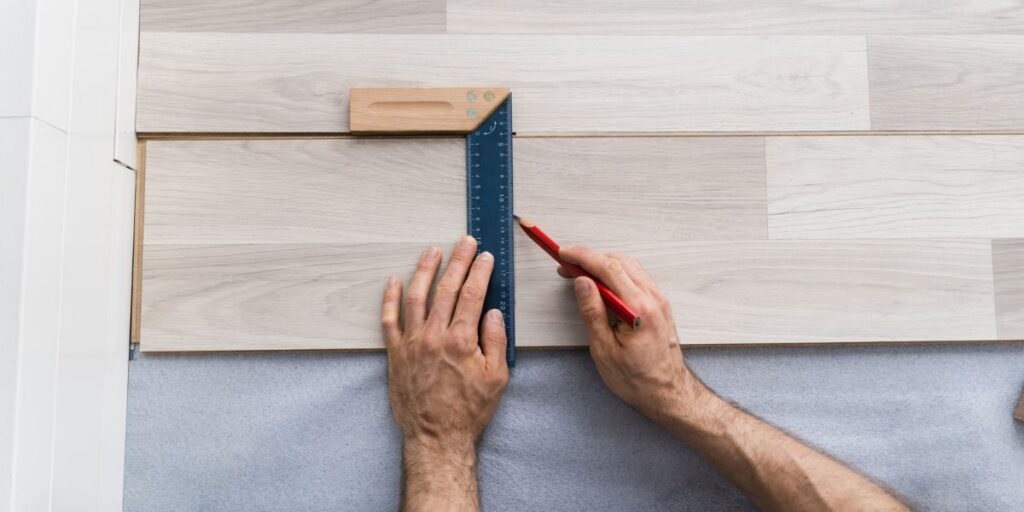
Tips for Measuring and Cutting Accurately
The key to getting accurate measurements and cuts lies in taking your time and using precise tools. Start by investing in a good table saw if you don’t already have one; this will give you clean cuts every time. Next, always measure twice before making any cuts – and then measure again just to be safe!
It’s better to take extra time at this stage than end up with incorrect measurements down the line. Don’t be afraid to use a jigsaw or circular saw to make curved cuts around doorways or other obstacles.
With the right blade and a steady hand, you can achieve professional-looking results every time. Remember, the success of your laminate flooring project depends largely on your ability to measure and cut accurately.
Take your time, invest in good tools, and don’t be afraid to ask for help if you need it. You’ll be rewarded with beautiful, durable floors that will last for years to come.
Section VII: Rushing through Installation
The Importance of Taking Time During Installation
When it comes to installing laminate flooring, one of the biggest mistakes that homeowners make is rushing through the process. It’s understandable – you want your new floors in place as soon as possible so you can enjoy them.
However, if you don’t take the time to do things right, you’re going to end up with floors that look bad and may even be unsafe. One of the most important reasons to take your time during installation is to ensure that all of the planks fit together properly.
If you rush through this step, you’re likely to end up with gaps or uneven spots that will look terrible and could be a tripping hazard. You also need to make sure that each plank is securely attached since loose planks can cause further damage over time.
Common Mistakes Made When Rushing Through Installation
The most common mistake made when rushing through installation is not allowing enough time for acclimation. Laminate flooring needs time to adjust to the temperature and humidity levels in your home before it’s installed. Failure to acclimate the planks properly can cause them to expand or contract after installation, leading to gaps or warping.
Another mistake often made when rushing through installation is not leaving enough space for expansion around room edges and obstacles such as doorframes. Laminate flooring needs expansion space so it can move freely as it expands and contracts with temperature changes.
Many people rush through cutting and measuring planks, which can lead to mistakes that are impossible to correct once the floor is installed. It’s important to measure carefully and cut accurately in order for all planks to fit snugly together without any gaps.
Taking your time during installation may seem like an unnecessary hassle, but it’s essential if you want your laminate floors to look great for years to come. Rushing through installation can lead to a range of problems that will cost you time, money, and frustration in the long run.
Frequently Asked Questions
Where should you not put laminate flooring?
Laminate flooring should not be installed in areas with high moisture levels, such as bathrooms, saunas, or enclosed porches, as it can cause the planks to warp or buckle.
Why does my laminate flooring keep separating while installing?
Laminate flooring may keep separating during installation if the locking mechanisms between the planks are not properly engaged or if the subfloor is uneven or not properly prepared.
Does it matter which direction laminate flooring is laid?
The direction in which laminate flooring is laid can affect the overall appearance of the space. It is generally recommended to lay laminate flooring parallel to the longest wall in the room to create a visually appealing layout.
Can you put laminate on slightly uneven floor?
Laminate flooring can be installed on slightly uneven floors, but it is important to ensure the subfloor is relatively level to prevent issues with the installation and the long-term durability of the flooring. Using an underlayment or leveling compound can help address minor irregularities.
Do you have to use transition strips between rooms?
Transition strips are typically used between rooms with different flooring materials, such as transitioning from laminate to carpet or laminate to tile. They help create a smooth and seamless transition while allowing for the expansion and contraction of the flooring.
Does the tongue or groove go against the wall?
When installing laminate flooring, the groove side of the plank should face the wall to allow the tongue of the next plank to fit securely into it. This helps create a tight and secure fit between the planks.
Conclusion:
Proper installation of laminate flooring is essential for ensuring its longevity and visual appeal. It is important to take the time to prepare the subfloor, use an appropriate underlayment, leave enough space for expansion, and cut planks accurately.
Rushing through installation or neglecting to acclimate the flooring can result in costly mistakes down the line. Throughout this article, we have covered common mistakes made during laminate flooring installation and provided solutions for avoiding them.
From not acclimating the laminate flooring to incorrectly cutting or measuring planks, each mistake has potential consequences that can be avoided with proper preparation and attention to detail. Furthermore, it cannot be emphasized enough how crucial it is to prioritize proper installation techniques.
Cutting corners or trying to rush through a project will only lead to frustration and disappointment in the end result. Taking the time upfront will save time and money in the long run by avoiding costly repairs or replacements in the future.
So remember: do not overlook any step when laying your laminate floorings if you want them to look great and last long! Always prioritize proper preparation and attention to detail because this will ensure you’re setting yourself up for a successful outcome!