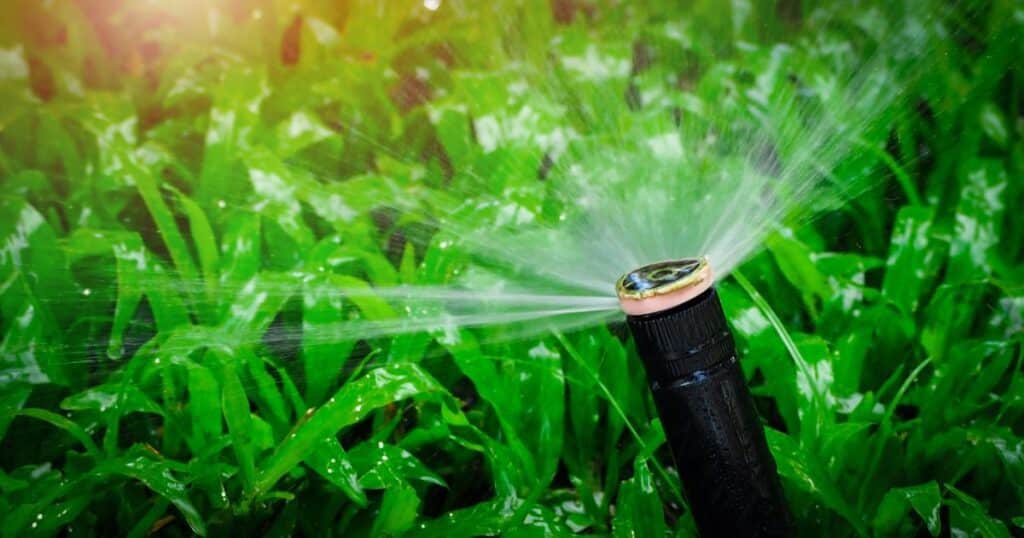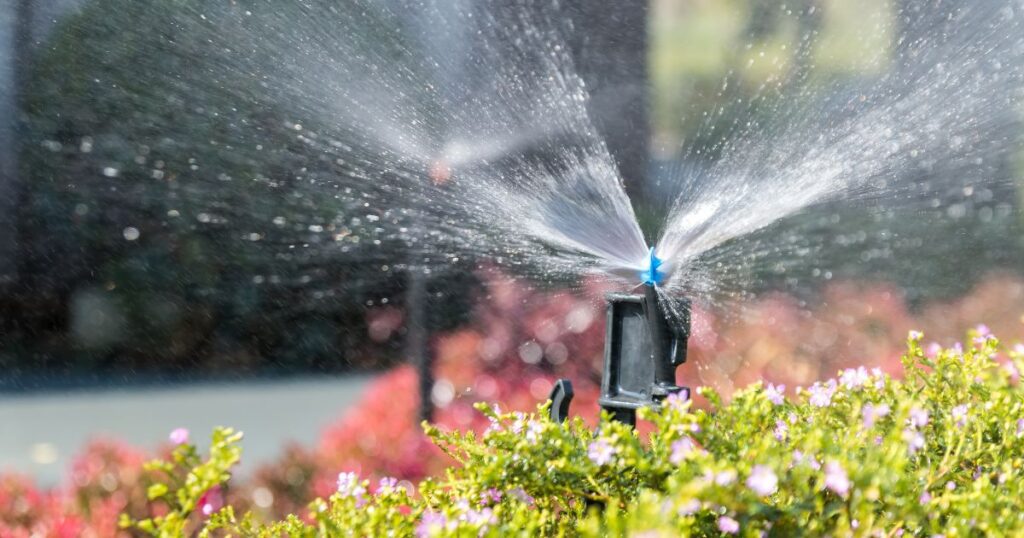
Are your sprinkler heads not hitting the right spots? Don’t worry, we’ve got the scoop on how to move those little water warriors! In this guide, we’ll show you the tricks to relocate your sprinkler heads like a pro, ensuring maximum coverage and precise watering. So, put on your sprinkler detective hat and get ready to unlock the secret to shifting those sprinklers with ease. Your lush, green lawn will thank you!
To move a sprinkler head, first locate the head you want to move. Use a shovel to carefully dig around the head, exposing the riser and pipes below. Unscrew the head from the riser, and reposition it to the desired location. Secure the head back onto the riser and test the sprinkler system to ensure proper functioning.
The Importance of Proper Sprinkler Head Placement
Proper placement of sprinklers ensures that water is delivered efficiently where it’s needed most in your garden or lawn. Water should be distributed uniformly over the coverage area without wasting any due to overspray or runoff.
If water is being wasted due to improper placement of your existing sprays, then you need to move them so that they spray only where they are needed most. For instance, if there are plants in a location that gets too much sun exposure and requires more watering than other areas in your yard, then moving a sprayer head closer will provide proper watering while saving on water consumption costs.
Overview of Steps Involved In Moving Sprinkler Heads
If you find yourself in need of relocating a sprinkler head, rest assured that careful planning and attention are key. Knowing how to move sprinkler heads entails following a step-by-step process to ensure a successful transition.
- Assessing the current sprinkler system: The first step is to determine where the existing heads are located and what type they are. You also need to check if there’s any damage or wear and tear that needs repairing.
- Planning the new layout: this stage involves determining where you would like to place your new sprinkler heads, taking into account factors such as water pressure, coverage area, and plant type.
- Gathering necessary tools and materials: Before starting, it’s essential to gather all required tools, such as a shovel, PVC pipe cutter, and Teflon tape. You will also need necessary materials such as PVC pipes, fittings, and replacement heads.
- Shutting off water supply: It’s crucial to turn off the main water supply before digging up old heads or attempting to move any existing plumbing. This ensures that there is no accidental flooding while working on replacing your irrigation lines.
- Digging up old sprinkler heads: Moving an existing irrigation head requires careful digging around it with a shovel while removing any dirt or debris from around the area.
So let’s dive into each step in detail so that you can change the placement of your sprinklers with confidence.
Assessing the current sprinkler system
Identifying the location and type of existing sprinkler heads
The first step in moving sprinkler heads is to have an understanding of the current layout of your system. Before you can begin planning your new layout, you need to know where the existing sprinkler heads are. This can be done by walking around your yard or garden and taking note of each head’s location.
Typically, they will be in a line, with equal spacing between each head. Once you have identified the location of each head, take note of their type.
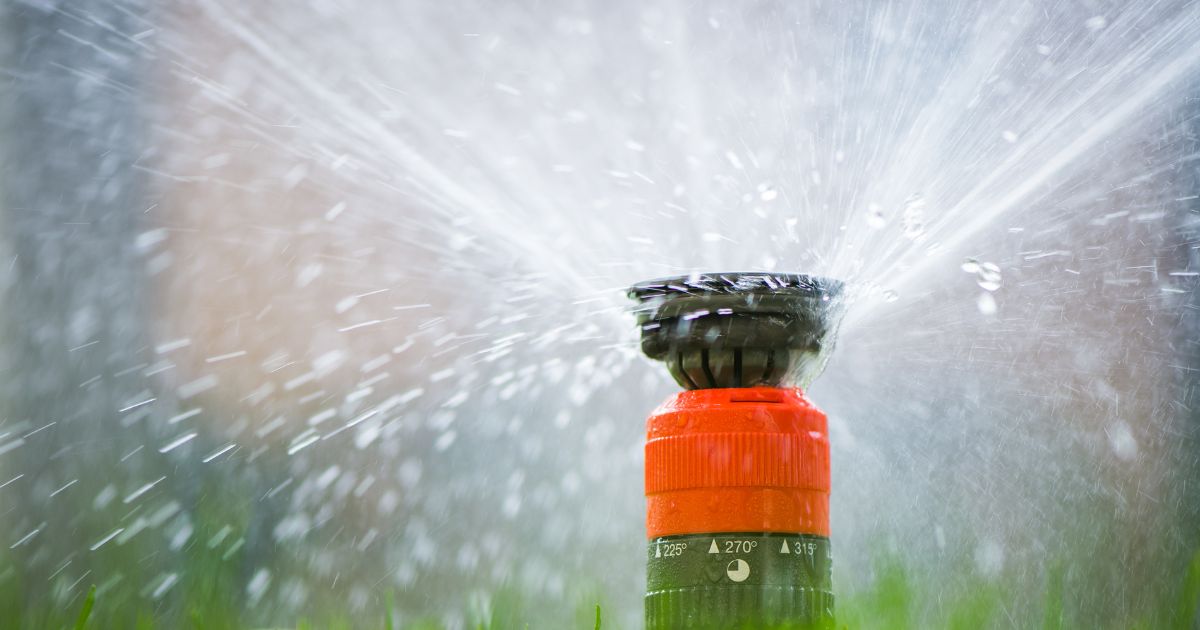
There are several different types of sprinkler heads, including fixed spray heads and rotary heads. Fixed spray heads will emit a constant stream of water in one direction, while rotary heads will rotate slowly to provide even coverage across a larger area.
Checking for any damage or wear and tear on the existing system
After identifying the location and type of each head, it’s important to check for any damage or wear and tear on the existing system. Look for signs of leaking water or broken pipes around each head.
Check if there is any dirt buildup or other debris that could affect water flow. It’s also important to look at the condition of each individual sprinkler head.
Check for cracks or other visible damage that may require replacement. A damaged sprinkler head can cause uneven watering and wastewater.
If there is significant damage to your current system, it might be more cost-effective to replace it entirely rather than just trying to move individual parts. In addition to checking for damage or wear and tear on existing components, also evaluate whether your current setup is meeting all watering needs appropriately – take into account growth changes over time which may impact coverage as well as climate conditions where applicable.
Determining water pressure at various locations throughout your yard
Another aspect of assessing your current sprinkler system is measuring water pressure at various locations throughout your yard. Water pressure affects how far and how evenly water is distributed from each sprinkler head.
Irregularly low or high pressure can also indicate damaged pipes or other issues that need to be addressed separately. You can measure water pressure using a simple gauge that attaches to an outdoor spigot, available at most hardware stores for under $20.
Turn on the spigot and attach the gauge, then take readings at different points in your yard. If you notice a significant difference between these readings, it’s important to adjust accordingly when planning your new layout.
Mapping out coverage areas
One last step in assessing your current system is mapping out coverage areas of existing sprinkler heads. Draw a rough sketch of each zone and mark off where the spray pattern hits with chalk or something else non-permanent; this will help plan future adjustments.
This will help you identify any gaps in coverage, as well as areas where water is being wasted due to overlapping coverage zones. By understanding the existing layout – including both strengths and shortcomings -, it becomes easier to plan an optimized new setup.
Key takeaways from assessing the current system
Assessing your current sprinkler system before moving forward with any changes allows you to evaluate how effective it currently is while gaining a better understanding of its strengths & weaknesses: – so you can optimize for success.
- Identify the existing location & type of head
- Check for damage/wear & tear on existing components
- Measure water pressure at different locations throughout the yard
- Map out existing head coverage areas
- Take note of strengths & weaknesses
Planning the New Layout
RELATED: How To Winterize A Sprinkler System With Backflow Preventer
Determining Optimal Placement for Each New Sprinkler Head
When moving sprinkler heads, it is important to take the time to plan out the new layout. This includes determining the optimal placement for each new sprinkler head.
To do this, take into account factors such as water pressure, coverage area, and plant type. Water Pressure: Before setting up your new sprinkler system, it is important to measure the water pressure of your current system.
This will help you determine how many heads can be run at once and what kind of coverage each head needs. If you are unsure how to measure water pressure, consult a professional or use a pressure gauge.
Coverage Area: When determining the placement of each sprinkler head, consider the coverage area needed for each type of plant in your lawn or garden. For example, large trees may require multiple sprinklers, whereas smaller plants may only require one.
Plant Type: Different types of plants have different watering needs. Consider grouping plants with similar watering needs together so that they can be watered efficiently and effectively.
Taking into Account Factors such as Soil Type and Sun Exposure
In addition to considering water pressure, coverage area, and plant type when planning your new sprinkler system layout, it is also important to take into account other factors such as soil type and sun exposure. Soil Type: Some soils drain more quickly than others which can impact how much water a certain area needs. Sandy soil will typically require more frequent watering than clay soil which may retain moisture for longer periods of time.
Sun Exposure: Areas with more sun exposure will generally need more frequent watering than areas that are shaded or receive less sunlight. Keep this in mind when planning out where to place each sprinkler head.
Creative Subtitle Here
When planning the layout for your new sprinkler system, it is important to take into account any obstacles that may be in the way. This includes things like rocks, garden beds, and pathways. Be sure to lay out your new system in a way that takes these obstacles into account so that your plants receive adequate water without damaging any other areas of your lawn or garden.
It is also important to consider the spacing between each sprinkler head. Sprinklers should be placed close enough together to ensure proper coverage but not so close that there is overlap which can lead to overwatering and waste.
The distance between each head will depend on factors such as water pressure and the coverage area needed. When planning out your new sprinkler system layout, keep in mind any potential future changes, such as adding new plants or changing the layout of your garden beds.
Be sure to plan a flexible system that can be easily modified if needed. By taking into account factors like water pressure, coverage area, plant type, soil type, sun exposure, and potential obstacles when planning out the new layout for your sprinkler system, you are ensuring an efficient and effective watering solution for all of your plants.
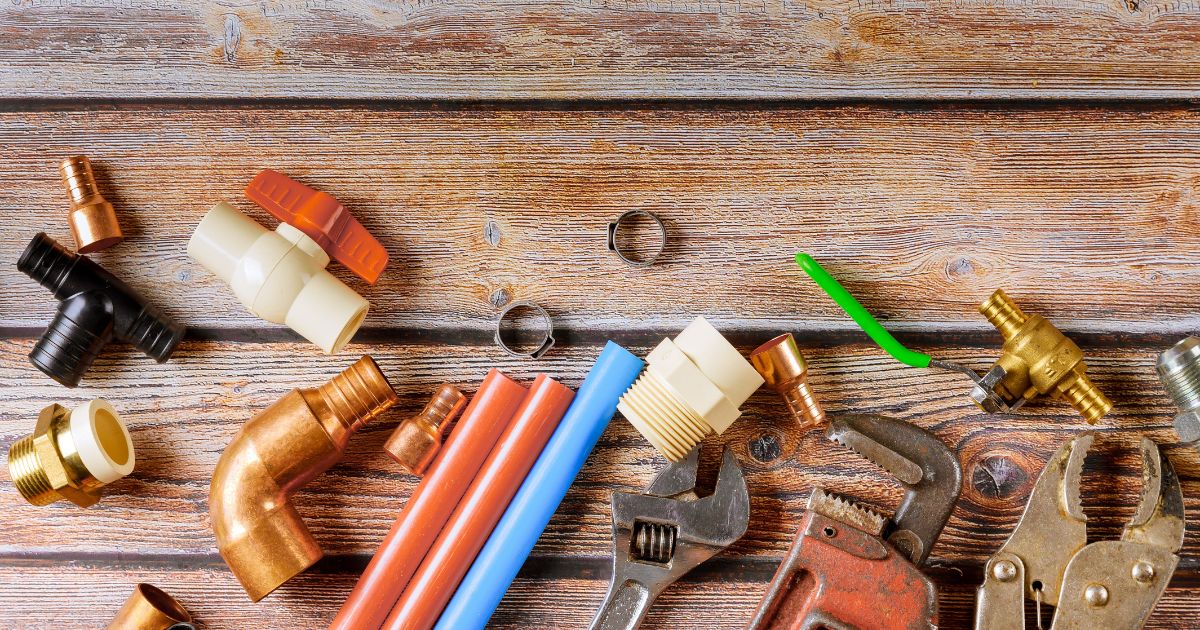
Gathering Necessary Tools and Materials
Tools Required for Moving Sprinkler Heads
Before embarking on the task of moving sprinkler heads, it is essential to have all the necessary tools ready. The following tools will be required for moving sprinkler heads:
1. Shovel: A shovel is needed to dig up the old sprinkler heads from the ground.
A square shovel that has a flat edge works best.
2. PVC Pipe Cutter: A PVC pipe cutter is essential to cut the existing pipes without damaging them.
3. Teflon Tape: Teflon tape helps create a secure seal and prevents leaks around fittings and joints.
4. Adjustable Wrenches: These are used to tighten or loosen nuts and bolts around fittings and joints.
5. Hacksaw: If you need to cut any metal pipes, a hacksaw can help.
6. Screwdriver: A screwdriver can be helpful in removing screws that hold the old sprinkler heads in place.
Materials Needed for Moving Sprinkler Heads
In addition to tools, you will also need several materials required for moving sprinkler heads:
1. PVC Pipes: You will need new PVC pipes of various lengths depending on where you plan on installing new sprinklers.
2. Fittings: Different types of fittings, such as couplings, elbows, and tees, are used to connect the PVC pipes together at various angles.
3. Replacement Heads: You will also need replacement head(s) depending on how many old ones you are replacing or if your existing ones have become worn out or damaged beyond repair.
4. Threaded Adapters & Risers: These components are inserted into existing irrigation lines so new risers can be attached at desired locations above ground level.
5. Spray Heads or Rotors: Depending on your preferred method of irrigation (spray or rotor), you will need to purchase the corresponding type of sprinkler head.
Where to Source Materials for Moving Sprinkler Heads
All of these tools and materials can be found at your local hardware store or home improvement center. Some stores even offer kits that contain all the necessary materials for moving sprinkler heads in one package.
Don’t forget to measure the area in which you will be installing new heads so that you purchase enough pipes and fittings. It’s always a good idea to have some extra parts on hand just in case something goes wrong during installation.
Shutting Off the Water Supply
The Importance of Turning Off the Water Supply
Before beginning any work on your sprinkler system, it is crucial to turn off the water supply to avoid any accidental flooding or damage. Failing to do so can result in a huge mess and costly repairs.
When you turn off the water supply, it is essential to ensure that everyone in your house is aware of what you are doing. This will prevent anyone from turning the water back on while you are working.
Locating Your Main Water Shut-Off Valve
The main water shut-off valve controls all of the water entering your home and is typically located near where the main water line enters your home. Depending on where you live, it may be located outside of your home or in a basement or utility room. It’s important to determine where this valve is located before you start working on your sprinkler system.
Shutting Off Your Main Water Valve
Once you have found your main water shut-off valve, use a wrench or pliers to turn the valve clockwise until it stops. This will stop all incoming water from entering your home’s plumbing system and prevent any accidents from happening while working on your irrigation system.
Relieving Pressure from Sprinkler System
After turning off the main shut-off valve, open one of the outdoor spigots and let all remaining water in the pipes drain out. This will relieve any pressure that may still exist in the pipes so that they won’t burst when being worked on.
Checking for Leaks Before Starting Work
Before starting work, double-check that there are no leaks present anywhere in your system by inspecting all pipes, fittings, and valves carefully. If there are leaks present anywhere in your system after shutting off the main valve, it is crucial to call a professional plumber immediately to have them repaired before continuing.
Digging up old sprinkler heads
The importance of digging carefully
Before attempting to remove an old sprinkler head, it’s important to dig carefully around the area. A shovel is the best tool for this job, as it allows you to remove dirt without damaging any underground pipes or wires. It’s important to dig slowly and carefully around the sprinkler head so that you don’t accidentally hit any other components of your sprinkler system.
Removing dirt and debris
Once you’ve dug enough around the old sprinkler head, gently pull it out of the ground. You may need to wiggle it back and forth a bit to loosen any dirt or debris that has accumulated around the base of the sprinkler head. Be careful not to damage any pipes or wires that are connected to the sprinkler head.
Checking for damage or wear and tear
Take a close look at each removed sprinkler head for signs of wear and tear, such as cracks in plastic components or rust on metal ones. If you spot any damage, make a note of it so you can replace those parts later on when installing new heads.
Cleaning up after removal
After removing all old heads from their respective locations, be sure to clean up any remaining mess in your lawn by filling in holes with soil and then watering well so that the grass will grow back quickly over time.
Taking note of the placement
As you remove each old sprinkler head, take note of its exact placement using stakes or flags so that when it comes time to install new heads later on down the line, you’ll know exactly where each one needs to go without having to guess where they used to be located.
Replacing old pipes with new ones
One of the most important steps in moving sprinkler heads is replacing any damaged or worn pipes. Over time, PVC pipes can crack or break due to extreme weather conditions or general wear and tear.
These damaged pipes can lead to leaks and decreased water pressure, which can affect the performance of your entire sprinkler system. To replace old pipes, you will first need to turn off the main water supply to your sprinkler system.
This will prevent any accidental flooding while you are working. Next, use a PVC pipe cutter to carefully cut out the damaged section of pipe.
It is important to make clean cuts as jagged edges can cause leaks in the future. Once you have removed the damaged section of the pipe, measure and cut a new piece of PVC pipe using a pipe cutter.
Make sure that the new piece of pipe is long enough to fit between the two existing sections and that it is compatible with your existing sprinkler system fittings. Before installing the new section of pipe, ensure that both ends are clean and free from debris.
Use sandpaper or emery cloth to remove any rough edges on both pipes if necessary. Then apply Teflon tape around both ends of each pipe fitting before connecting them together by sliding them over each end and tightening them with pliers.
After connecting all necessary fittings, turn on your main water supply and check for any leaks in your new piping installation. If there are no leaks present, continue with installing your new sprinkler heads onto these freshly installed sections of piping.
RELATED: How To Find Sprinkler Lines: Comprehensive Guide 2023
Cutting out damaged or worn pipes using a PVC pipe cutter
The key tool needed for this process is a PVC Pipe Cutter which ensures that you obtain a smooth-edged cut without causing damage to surrounding materials if done correctly. Before beginning the process of cutting out damaged or worn PVC pipes, it is essential to turn off the main water supply to your sprinkler system.
This will prevent any water from leaking out as you work on the pipes. To start cutting, simply position the pipe cutter onto the damaged or worn section of PVC pipe that needs replacing and align it to where you want to make the cut.
Squeeze the handles of the cutter together until it makes a clean cut through your pipe. After cutting out any damaged sections, carefully remove them and any debris around them before proceeding with installing new piping.
Be sure not to twist or bend the remaining pipes too much, as this can cause more damage than good The process of cutting out damaged PVC piping may be time-consuming, but it is crucial for ensuring that your sprinkler system operates at peak performance levels once you have completed all necessary repairs.
Installing new pipes using appropriate fittings
When installing new PVC pipes during a sprinkler head move project, there are several important factors to keep in mind. First and foremost, ensure that any new piping you purchase is compatible with your existing sprinkler system fittings.
You can do this by checking manufacturer specifications or consulting with a professional plumber if you are unsure which type to purchase. Once you have purchased compatible piping, measure and mark each piece of the pipe according to your desired length before cutting using a high-quality PVC pipe cutter.
As mentioned earlier in this article, it’s important that cuts are smooth so that they can be easily joined together without causing leaks over time. You may need additional fittings, such as elbows or tees, depending on how complex your new piping layout is going to be.
It’s essential always read manufacturer instructions when fitting these pieces together so that they do not become misaligned at installation, which could lead to leaking issues later down the line. After installing all new pipes, it is essential to check for leaks before proceeding with the final stage of installation.
Turn on your main water supply and check for any drips or leaks around your new piping connections. If everything looks good, proceed with installing your new sprinkler heads.
Overall, proper installation of new PVC pipes during a sprinkler head move project requires attention to detail and following instructions carefully. Make sure to select compatible piping that is appropriate for your existing system and use high-quality tools such as a PVC pipe cutter to ensure smooth cuts without damage to surrounding materials.
Installing new sprinkler heads
Attaching new heads to newly installed pipes
Once the new pipes have been installed, it is time to attach the new sprinkler heads. Begin by ensuring that you have all the necessary tools and materials, including any adapters or fittings necessary for attaching your particular type of sprinkler head.
First, apply Teflon tape to the threads of the pipe where you will be attaching the head. This will help create a tight seal and prevent leaks.
Next, screw on any adapters or fittings according to the manufacturer’s instructions. Carefully screw on your new sprinkler head, taking care not to apply too much force as this can damage the threads.
Covering all bases with overlapping coverage
When installing your new sprinkler heads, it is important to ensure that they provide adequate coverage for your lawn or garden area. One way to do this is through overlapping coverage, where adjacent sprinklers are positioned so that their spray patterns overlap slightly. To achieve overlapping coverage, begin by placing your first sprinkler in its designated location based on your planning layout.
Then, position adjacent sprinklers at a distance where their spray patterns will overlap slightly at their outer edges. This may require some trial and error adjustments until you find the optimal spacing for each head.
Frequently Asked Questions
How do I change the position of my sprinkler head?
To change the position of a sprinkler head, simply twist or rotate the head in the desired direction. Some sprinkler heads may have an adjustment screw that allows you to fine-tune the spray pattern.
How do sprinklers move?
Sprinklers move by utilizing water pressure to rotate or oscillate. Rotary sprinklers have internal gears that rotate the nozzle, while oscillating sprinklers have a mechanism that moves the spray arms back and forth, creating a sweeping motion.
How do you lift a sprinkler head?
To lift a sprinkler head, locate the riser or stem connected to the sprinkler body and gently lift it upwards. Be careful not to apply excessive force that could damage the sprinkler or its connections.
Is it easy to adjust sprinkler heads?
Yes, adjusting sprinkler heads is generally easy. Most sprinkler heads have adjustable features such as rotation, spray pattern, and distance control, which can be modified by hand or with the help of a specialized tool.
Do you need a special tool to adjust sprinkler heads?
While it’s not always necessary, some sprinkler heads may have adjustment features that require a specialized tool, such as a sprinkler head adjustment key or a screwdriver. However, many sprinkler heads can be adjusted by hand without the need for additional tools.
How do I lower my sprinkler head?
To lower a sprinkler head, carefully dig around the base of the head to expose the riser or stem. Unscrew or detach the sprinkler head from the riser, then adjust the height of the riser by cutting it to the desired length before reattaching the sprinkler head.
Conclusion
Moving sprinkler heads may seem like a daunting task at first, but with proper planning and execution, it can be done quickly and effectively. Remember to assess your existing system before making any changes and take into account factors such as water pressure and plant type when planning your new layout.
When it comes to the installation of new pipes and heads, ensure that you have all the necessary materials on hand and follow manufacturer instructions carefully for the best results. With these steps in mind, you’ll be well on your way to achieving a well-watered and healthy lawn or garden area.