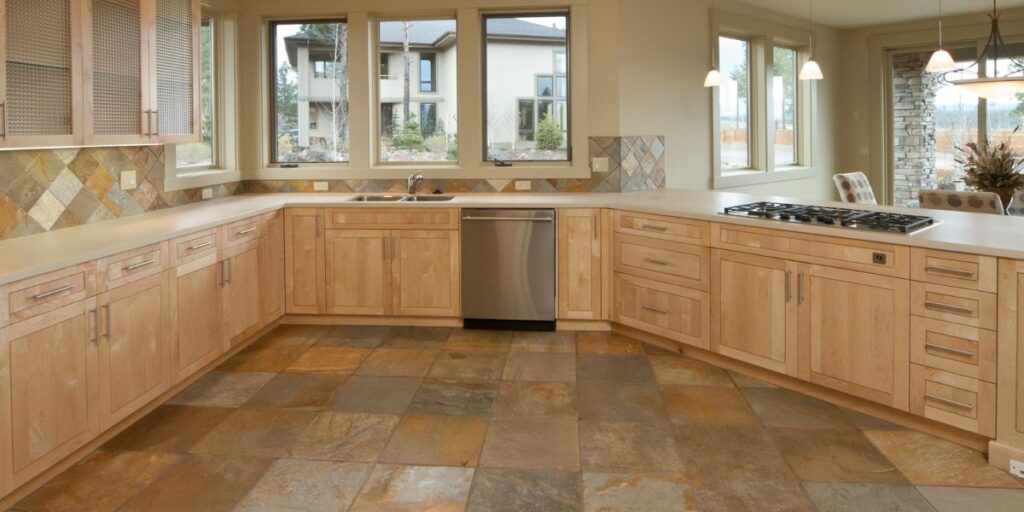
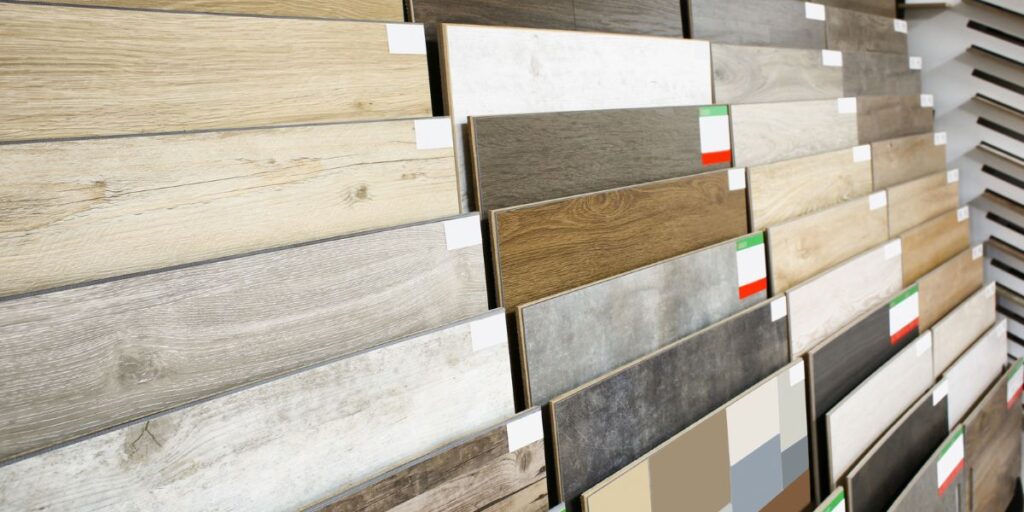
What is Laminate Flooring?
Laminate flooring is a type of synthetic flooring made of several layers of materials, including wood fibers, resin, and a thin layer that resembles wood or stone. It was designed to mimic the look of hardwood or stone flooring without the high price tag. While it may seem like an affordable option for homeowners who want to update their floors, laminate flooring can cause many problems if not installed correctly.
Why Someone Might Want to Remove It
There are many reasons why someone would want to remove laminate flooring. Perhaps it was installed incorrectly, and now there are issues with the subfloor or moisture damage.
Maybe you’re tired of the outdated look or color and want to install a different type of flooring that suits your style better. Whatever your reason may be, it’s important to properly remove laminate flooring so that you don’t cause any further damage to your room.
How to Remove Laminate Flooring Properly?
Removing laminate flooring can be an arduous task if you don’t know what you’re doing. Not only can it be physically challenging (trust us, all the furniture will probably need to be moved out), but there’s also the potential for damaging your subfloor if done incorrectly.
This is why proper removal techniques are crucial when it comes time to remove laminate planks from your floor. When removing glued or floating laminate planks, retaining channels hold them in place next to each other instead of attaching them directly on top of the sub-flooring material surface like hardwood floors do without retaining channels needed due to their weight.
When using a flat bar or pry bar on retaining channel-free floating laminates, make sure that they do not come up too fast, which will cause stress on retaining channels collecting glue residue from glued laminate planks installation such as adhesive glue residue from subflooring material. So, before you grab a hammer and start hitting away at your old laminate flooring, take the time to research and understand what type of laminate flooring was installed in your room.
If you don’t have experience removing laminate flooring, consider seeking advice from professionals or asking for help at your local hardware store. Remember that taking the time to properly remove laminate flooring can save you money and frustration in the long run.
Preparation
Gather Necessary Tools, or You’ll Regret It Later
Removing laminate flooring can be a real pain in the backside, but it doesn’t have to be. One of the most important things you can do to make this job go smoothly is to gather all the necessary tools before starting. Trust me when I say that you don’t want to get halfway through and realize that you don’t have what you need.
First up, you’ll need a circular saw with a fine-toothed blade for cutting through the laminate planks. Don’t forget a good pair of heavy leather gloves – they’ll protect your hands from cuts and splinters.
You’ll also need a pry bar and hammer for lifting up each plank individually. If your planks are glued down, then you’ll also want to have a floor scraper on hand.
Clear The Room Or Risk Injury
Before removing laminate flooring, it’s essential that you clear the room of all furniture and other obstructions. This not only makes it easier to move around but also reduces the risk of injury. Trust me when I say that tripping over an ottoman while carrying heavy planks is not fun.
Take your time with this step and make sure everything is out of the way. Don’t forget to remove any transition strips between your existing flooring and the laminate if there are any.
Turn Off Electrical Outlets To Avoid Danger
Another essential prepping step when removing laminate flooring is turning off any electrical outlets in the area. This will prevent anyone from accidentally electrocuting themselves when using power tools or handling wet materials during cleanup. It’s also crucial if there’s any chance water could come into contact with electrical outlets during cleanup or new floor installation.
By following these preparation steps as outlined above, removing laminate flooring won’t be nearly as daunting a task as you might have initially thought. Remember, proper preparation leads to the successful removal and installation of new flooring.
The Art of Laminate Flooring Removal
Explain how removing laminate flooring is like peeling off a giant sticker
Do you remember when you were a kid, and you used to love peeling stickers off everything? Well, removing laminate flooring is just like that, except on a much larger scale. It’s like peeling off a giant sticker from your floor.
And let’s face it, who doesn’t love to peel off stickers? There is something so satisfying about it that makes us feel accomplished in an odd way.
But unlike stickers, removing glued flooring may require more effort and patience. It can be a daunting task, but don’t worry; with the right techniques and tools at your disposal, it can be easier than you think.
Describe how satisfying it can be to pull up large sections at once
Now imagine that feeling of satisfaction multiplied by 10 when you manage to pull up large sections of laminate flooring all at once. There is no better feeling than seeing an entire chunk of the floor come up as if it was never glued down in the first place. It’s cathartic in some way, almost therapeutic.
The best way to achieve such satisfaction is by using a flat bar or pry bar underneath the edge of the floorboard until it lifts up slightly. Then use your heavy leather gloves for protection as you grab onto the board and yank upwards with force until the nails stuck are free from glue residue and lift out entirely without any damage.
Just be careful not to damage surrounding walls or baseboards in this process as they may need replacing along with new flooring installation or glued back down again afterward. You don’t want to create more work for yourself later on because of carelessness now.
There is something truly satisfying about removing laminate floors from your home but remember- don’t get too caught up in destroying them that you forget about the remaining rows or other debris. Always aim for a job well done.
Removing Baseboards
Why Baseboards Need to Be Removed Before Starting
Before you even think about how to remove laminate flooring, you need to address the baseboards. It might seem like a hassle to take them down, but trust me – it’s worth the extra effort in the long run.
First of all, removing the baseboards will give you more space to work with and make it easier to access the laminate planks. This is especially important if your flooring is glued down, as you’ll need all the leverage you can get to pry up those stubborn planks.
But perhaps more importantly, taking off the baseboards will protect them from damage during the removal process. If you leave them in place and try to forcefully pull up laminate planks, there’s a good chance that you’ll accidentally hit or scratch your baseboards with a pry bar or hammer.
So don’t be lazy – take ten minutes to carefully remove your baseboards before starting on your flooring. Your future self (and your wallet) will thank you.
Providing Tips for Removing Baseboards Without Damaging Them
Alright, so now that we’ve established why it’s important to remove your baseboards before tackling your laminate floor, let’s talk about how best to do it. First of all, gather some essential tools: a utility knife and a small pry bar or flathead screwdriver should do the trick.
You might also want some felt marker handy so that you can label each piece as it comes off – this will make reinstallation much easier later on. Once everything is prepped and ready to go, start at one end of your room and carefully slide your utility knife along the top edge of each baseboard.
This will help break any paint or glue residue that might be holding it in place against the wall. Next, use your pry bar to carefully remove each board, starting at one end and working your way across the room.
If you’re having trouble getting a piece to budge, try using your hammer to gently tap the bar underneath it. Remember: take your time and be patient.
Trying to rush this step will only result in damaged baseboards and frustration later on. With heavy leather gloves on, you can avoid splinters or other debris while removing baseboards.
By taking the time to properly remove your baseboards before starting a laminate floor removal project, you’ll ensure that everything goes smoothly from start to finish. So don’t cut corners – trust me on this one.
Cutting Laminate Flooring
Using a Circular Saw
Cutting through laminate flooring can be a daunting task, but with the right tools and technique, it can be done with ease. The circular saw is one of the most commonly used tools to cut through laminate flooring.
Before you start, you need to make sure that you have the appropriate blade for the job. You’ll want to use a fine-toothed saw blade that’s specifically designed for cutting through laminate materials.
Once you’ve got your saw ready, mark your cutting line on the surface of the laminate flooring using a felt marker. When using a circular saw to cut through laminate flooring, it’s important to be mindful of safety precautions.
Make sure that you’re wearing safety glasses to protect your eyes from any flying debris or dust particles that might get kicked up during the cutting process. You should also consider wearing ear protection if you’re going to be making multiple cuts or if your work area is particularly noisy.
Safety Tips for Using Power Tools
It’s important to remember that power tools can be dangerous if not used properly. When using a circular saw or other power tools during the process of removing laminate flooring, always keep your hands away from moving parts and blades. If possible, use clamps or other types of secure supports to hold down any materials being cut so they don’t move around while you’re working on them.
In addition to these precautions, there are some other safety tips that can help keep you safe while using power tools on laminate floors. For example, make sure all electrical outlets in the area are turned off before starting work so there’s no risk of electrocution.
Also, ensure that all cords are kept out of harm’s way and properly grounded when necessary. By following these tips and taking appropriate safety measures before starting work with power tools like circular saws, you can help ensure that the process of removing laminate flooring goes smoothly and safely.
The Satisfaction of Destruction
Destroying Laminate Flooring: A Therapeutic Experience
Ah, the satisfaction that comes with destroying a particularly stubborn piece of laminate flooring! It’s truly therapeutic. The sound of the blade cutting through the floor planks and the feeling of your muscles working as you use a pry bar to lift them up is pure bliss.
It’s almost like you’re punishing the laminate floor for all those years it spent glaring back at you with its bland, synthetic appearance. Nowadays, people are so focused on being neat and clean all the time that they forget how satisfying destruction can be.
Removing glued laminate flooring might seem like a daunting task but with the right tools and safety equipment such as knee pads and safety glasses from your local hardware store, you are ready for some hardcore destruction. Once you start removing your flooring material, it will be hard to stop!
Why Destruction is Necessary when Removing Laminate Floors
Let’s face it – no one desires to remove laminate floors just for fun! However, sometimes things have run their course or become outdated that they need to go! In this case, laminate floors must be removed properly by using tools like a circular saw or drywall knife to cut through glued seam breaks between floorboards before removing them carefully with a pry bar underneath.
Destruction becomes necessary in such cases because it allows you to get rid of old flooring material without damaging other parts of your home. However unpleasant this may sound initially, demolishing something can also bring an immense sense of relief and accomplishment once done correctly.
Satisfaction Through Completion: Mastering The Whole Process
Removing glued laminate flooring seems like grueling work, but as soon as you have mastered it using our handy guide teaching how to remove laminate floors, satisfaction will follow when completing each step along with the way. After cutting through laminated floorboards, simply slide the pry bar under them to remove them effectively, and voila!
You’ll feel like a pro! Take your time removing each piece for proper disposal once you’ve finished.
When removing laminate flooring, the last thing you want is to damage the subfloor or create any other problems that may cause issues with new flooring installation. So take your time mastering this art of destruction for satisfactory completion of the whole process!
Conclusion
When it comes to home renovation projects, it’s essential to remember that destroying something can be just as satisfying as building something new. The destruction of old flooring material can be especially therapeutic if you go about it the right way using safety equipment and tools such as knee pads and safety glasses from your local hardware store. Removing glued laminate flooring is not an impossible task but takes patience and practice!
By embracing this necessary destruction process step by step while using our handy guide on how to remove laminate floors, satisfaction will follow through the completion of every stage along with the way. So don’t wait any longer – grab those tools and start destroying that old laminate floor today!
Removing Laminate Flooring Planks
The Pry Bar and Hammer Method: Unleashing Your Inner Demolition Expert
Congratulations, you’ve made it to the fun part – ripping up those pesky laminate flooring planks. While some may see this as a daunting task, I see it as an opportunity to unleash my inner demolition expert. First things first, grab your pry bar and hammer and get ready to put in some elbow grease.
Starting at one end of the room, slide the pry bar underneath the edge of a laminate plank. Make sure to wear heavy leather gloves to protect your hands from any sharp edges or splinters that may come your way.
Now that you have the pry bar underneath the plank use your hammer to gently tap on the end of it until the retaining channels loosen up from each other. If you’re lucky, you’ll be able to simply slide out each plank with ease.
Avoiding Damage: The Subfloor is Your Friend
As satisfying as it may be to rip up those old laminate planks with reckless abandon, we must remember that our subfloor is still important for laying down new flooring in the future. Here are a few tips for avoiding damage:
Firstly, make sure not to gouge or scratch the subfloor while prying up each plank. Take your time and use gentle pressure when necessary.
If you encounter any glued seam breaks during this process (and let’s be real, who hasn’t?), don’t panic! Simply apply some gentle heat with a hairdryer and use your pry bar and hammer as previously instructed.
And lastly, make sure to clean up all debris from removing your old laminate flooring before installing new flooring. No one wants foam padding or other debris getting in the way of their beautiful new floating floor.
So get ready for some hard work (and maybe even a little bit of fun) as you remove your old laminate flooring and make way for a beautiful new look in your home. Don’t forget to wear knee pads!
Cleaning Up After Removal
The Importance of Proper Debris Clean-up
Once you’ve successfully removed that godforsaken laminate flooring from your home, it’s imperative that you properly clean up the debris left behind. Sure, it may seem like a tedious task, but trust me, neglecting to do so will only lead to further headaches down the line. The last thing anyone wants is bits of old laminate flooring and other debris scattered throughout their home.
First things first, be sure to use knee pads during this process. Your knees will thank you later.
Begin by using a flat bar or pry bar underneath any baseboards or transition pieces still remaining in the space. Once all baseboards and transition strips have been removed safely, use a broom and dustpan to sweep up any excess debris left behind on the subfloor.
Proper Disposal of Old Flooring Materials
Now that all the old laminate flooring has been removed from your home and properly cleaned up, it’s time to dispose of it all once and for all. It can be tempting to simply throw everything into a trash bag and call it a day, but there are some important things to keep in mind when disposing of old flooring material.
Firstly, check with your local hardware store or dump/recycling center for specific instructions on how they prefer materials like old laminate floors to be disposed of. Some locations may require specific bags or containers for disposal.
It’s also important to note that if your old laminate flooring was glued down rather than being installed as floating floors, there might be additional steps required before disposal in order to ensure there is no lingering glue residue on the material. This can include scraping off any remaining glue with a flat bar or other tool.
In closing, take pride in your hard work thus far in removing that terrible laminate flooring from your life. Continuously maintaining cleanliness and proper disposal practices in your home will only lead to a happier and healthier living space.
Frequently Asked Questions
Can you remove the laminate flooring yourself?
Yes, you can remove laminate flooring yourself with some effort and the right tools. It involves carefully detaching the planks using a crowbar or a floor scraper and then disassembling them.
How do I remove glued-down laminate flooring?
To remove glued-down laminate flooring, you can use a heat gun or a hairdryer to soften the adhesive, making it easier to pry up the planks. Then, use a scraper or a putty knife to lift and remove the laminate pieces.
How hard is it to remove old laminate flooring?
The difficulty of removing old laminate flooring can vary depending on factors such as the installation method, the adhesive used, and condition of the subfloor. It can be a labor-intensive task that may require patience and proper tools.
What is the best tool to remove laminate flooring?
A floor scraper or a pry bar is often the best tool for removing laminate flooring. These tools allow you to effectively separate the planks from the subfloor by applying leverage and minimizing damage to the underlying surface.
Can lamination be removed?
Lamination, which refers to the process of applying a protective layer to a material, can be removed in some cases. However, removing the lamination from the laminate flooring itself is not practical or recommended, as it would likely damage the flooring and compromise its integrity.
Is all laminate flooring glued down?
Not all laminate flooring is glued down. While some laminate floors may be installed using adhesive, others utilize click-lock or floating installation methods, which do not require gluing the planks to the subfloor. The specific installation instructions and product specifications will determine if the glue is necessary for a particular laminate flooring.
Conclusion
Proper Techniques are Essential for Successful Home Renovation
It is essential to remember the importance of removing laminate flooring in a proper and safe manner. With the right tools, preparation, and technique, you can avoid damage to your subfloor and ensure success in any future home renovation projects.
Protect Your Eyes and Body
During the whole process of removing old laminate flooring, be sure to protect your eyes with safety glasses or goggles. Furthermore, consider using foam padding or a cushion to support your knees and reduce strain on your back during extended periods of work. Your body will thank you later.
Dispose of Old Flooring Materials Responsibly
Remember to properly dispose of old flooring materials and other debris after completing the job. Place them in a sturdy bag or container for easy disposal.
This is not only good for the environment but also ensures that your workspace remains clean and organized for any remaining renovation tasks. By following these tips on how to remove laminate flooring like a pro, you can transform any room from outdated and worn-out to looking great in no time.
Remember that laminate flooring has a typical lifespan of around 10 years before needing replacement. So when it’s time for new floors be sure that you are equipped with knowledge on how to remove laminate flooring without damaging subfloor!