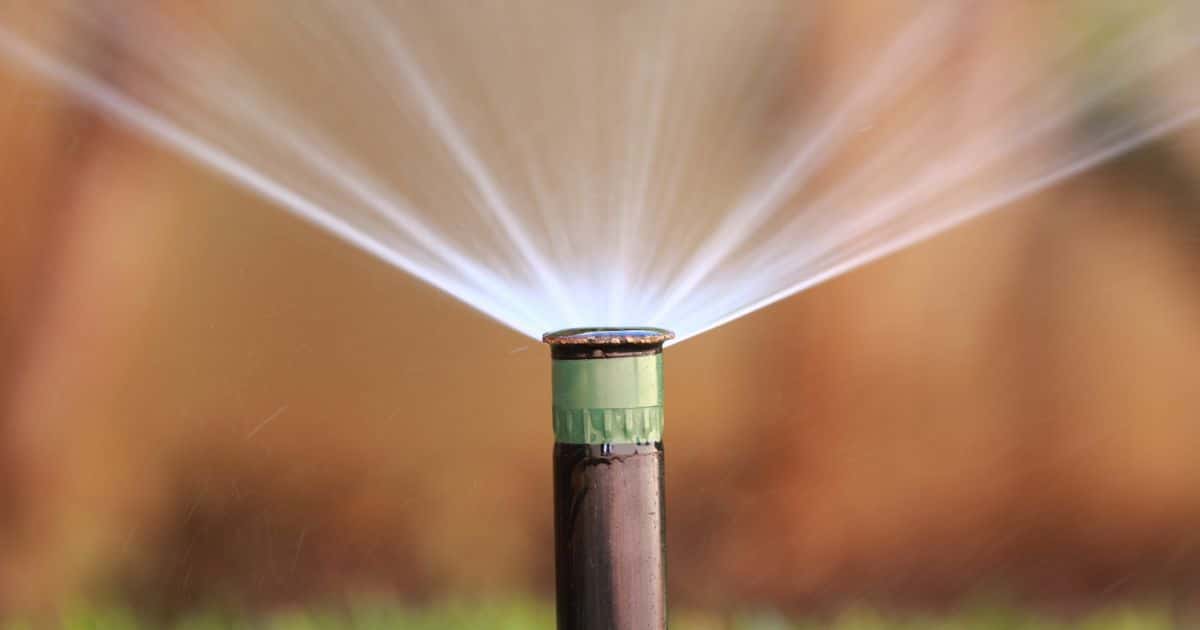
Attention, frustrated garden enthusiasts! Have you ever encountered a stubborn sprinkler head that refuses to do its graceful dance across your lawn? Fear not, for we have some sprinkler sorcery up our sleeves to help you solve this perplexing puzzle! In this guide, we will unveil the secrets of how to fix a sprinkler head that won’t rotate and provide you with the magical solutions to get it back into rotation. So grab your gardening wand and prepare to restore the whimsical twirl of your sprinkler system in no time!
To fix a sprinkler head that refuses to rotate, first, ensure that the water supply is turned off. Then, gently lift the sprinkler head from the riser and clean any debris or dirt that may be blocking its movement. Finally, check the gear drive mechanism and adjust it if necessary to restore the smooth rotation of the sprinkler head.
The Importance of a Functioning Sprinkler System
A functioning sprinkler system is essential for maintaining a healthy lawn or garden. Proper watering is necessary to keep plants well-nourished and hydrated.
Without sufficient water, plants can wither and die, leading to a barren and unsightly landscape. A properly functioning sprinkler system ensures that water is evenly distributed across the lawn or garden, providing optimal conditions for plant growth.
The Problem of a Sprinkler Head That Won’t Rotate
One common problem that homeowners face with their sprinkler systems is a non-rotating sprinkler head. A sprinkler head that won’t rotate can lead to uneven watering, resulting in brown patches on the lawn or overwatered areas that damage plant roots. It’s important to address this issue promptly before it causes further damage.
Ignoring a non-rotating sprinkler head can lead to more significant problems in the long run, such as damaged gears or clogged nozzles. These issues can be costly to fix and may require professional assistance.
In addition to affecting plant health, a non-rotating sprinkler head can also waste water and increase utility bills. The longer you wait to fix the issue, the more water (and money) you’ll lose in the process.
It’s crucial for homeowners to stay on top of their sprinkler maintenance and address any problems as soon as they arise. In this article, we’ll discuss how to diagnose and fix a non-rotating sprinkler head so you can ensure your lawn or garden stays healthy and beautiful all year round.
Assessing the Problem
Identifying the Non-Rotating Sprinkler Head
The first step in fixing a sprinkler head that won’t rotate is to identify which head is causing the issue. Once you turn on your system, walk around and visually inspect each of your sprinkler heads.
Look for any signs of water pooling around a particular head or a difference in the amount of water coming from one head compared to another. Another method for identifying a non-rotating sprinkler head is to use a marker or piece of tape to mark each head as it rotates.
Turn on your system and watch each head to see if it rotates and if it returns back to its starting position. If you notice that one or more heads do not rotate or return back to their starting position, you have identified the problematic heads.
Common Causes of Non-Rotating Sprinkler Heads
There are various reasons why a sprinkler head may not be rotating properly. One common cause is clogged nozzles, which can prevent proper water flow through the system.
Over time, dirt and debris can build up in the nozzles, causing blockages that restrict or completely stop the water flow. Another common cause of non-rotating sprinkler heads is damage to gears within the system.
Gears can become worn down or damaged due to age, excessive use, or exposure to elements such as dirt and debris. Debris within the system can also cause issues with rotation by interfering with moving parts such as gears.
Debris may enter through cracks in pipes, open valve boxes, or even through small gaps around sprinkler heads themselves. Low water pressure could be an issue when dealing with non-rotating sprinklers; insufficient pressure will not provide enough force for rotation.
It’s essential always to check all parts thoroughly before investing in new equipment. Identifying the issue early on will save time, money and could also extend the life of your existing system.
RELATED: How to Locate Sprinkler Lines: Best Techniques 2023
Tools NeededThe Right Tools for the Job
Before attempting to fix a non-rotating sprinkler head, it is important to gather the necessary tools. The right tools will make the job much easier and prevent further damage or frustration. Here are the essential tools you will need: Pliers
Pliers are a necessary tool for fixing sprinkler heads. They can be used to grip and hold parts while you work on them, making repairs much easier. Slip-joint pliers are versatile and adjustable, making them an excellent tool for this task. Screwdrivers
Screwdrivers are also an essential part of any sprinkler head repair kit. They can be used to remove screws that hold the head in place or adjust different parts of the head if necessary. A Phillips-head screwdriver is usually needed for sprinkler heads. Lubricant
Lubricant can be used to help with stubborn or rusted parts of your sprinkler system. It helps reduce friction and makes it easier to move gears or other moving parts. Make sure you choose a lubricant that is safe for use with plastic parts. Tweezers
Tweezers come in handy when removing small pieces of debris from around the base of your sprinkler head or cleaning out nozzles that may have become clogged over time. Wrenches
If there’s a problem with your sprinkler head’s connection point, you may need a wrench to remove it from its place before replacing it. Having these tools available ahead of time will ensure a smooth repair process when fixing non-rotating sprinkler heads. Additionally, having them all organized in one location means less time searching and more time dedicated to fixing the issue at hand.

How To Fix A Sprinkler Head That Won’t Rotate: Steps to Fixing
Turn off the water supply
Before starting any repairs on your sprinkler system, it is important to turn off the water supply at the main valve. This will prevent any water from flowing through the system and ensure your safety while you work. Make sure that the valve is fully closed before proceeding with any repairs.
Remove dirt and debris
Once you have turned off the water supply, use pliers or tweezers to carefully remove any dirt or debris from around the base of the non-rotating sprinkler head. Debris can often accumulate around the head and cause it to stick, preventing it from rotating properly. Make sure to remove all debris so that the head can move freely.
Check nozzle
If removing debris doesn’t solve the issue, unscrew and check the nozzle for clogs or damage. Clogged nozzles can prevent proper rotation in sprinkler heads.
You may also find that your nozzle has been damaged or worn out over time, causing it to malfunction. If this is the case, clean or replace as necessary.
Inspect gear drive
If you’ve checked for debris and replaced a clogged nozzle but still have a non-rotating sprinkler head, inspecting the gear drive might help solve your problem. Gears are an essential component of most rotating sprinklers, and if they become damaged, they will not rotate properly. Check for signs of damage, such as broken teeth or wear marks on gears.
Frequently Asked Questions
How do I get my sprinkler head to rotate?
To get your sprinkler head to rotate, check if the nozzle or rotor is clogged with debris and clean it if necessary. Additionally, ensure that the water pressure is sufficient for proper rotation.
Why is my sprinkler head not retracting?
If your sprinkler head is not retracting, it may be due to dirt or debris blocking its retraction mechanism. Clean the sprinkler head and ensure that the spring mechanism is functioning properly to allow smooth retraction.
Why won t my rotating sprinkler rotate?
If your rotating sprinkler is not rotating, check if the nozzle is clogged or if there is insufficient water pressure. Clean the nozzle and adjust the water pressure to allow for proper rotation.
RELATED: How To Move A Sprinkler Head: A Step-by-step Guide
How do you adjust a fixed sprinkler head?
To adjust a fixed sprinkler head, you can replace the nozzle with one that has a different spray pattern or adjust the spray distance using the manufacturer’s instructions.
How do you manually raise a sprinkler head?
To manually raise a sprinkler head, locate the adjustment screw on the side of the head and rotate it counterclockwise to raise the height. Be careful not to raise it too high to avoid damaging the sprinkler head or affecting its performance.
How do you adjust the radius of a sprinkler head?
To adjust the radius of a sprinkler head, locate the radius adjustment screw on the top or side of the head and rotate it clockwise to decrease the radius or counterclockwise to increase it. Refer to the manufacturer’s instructions for precise adjustments.
Conclusion
A non-rotating sprinkler head can be frustrating, but with some simple steps, you can fix this issue quickly and easily without calling in professional help. Firstly, make sure that you turn off your main water supply before beginning any repairs on your sprinkler system. Then, remove dirt or debris from around the base of the head, checking the nozzle and gear drive for damage.
This should solve most issues related to non-rotating sprinkler heads. By following these steps, you can ensure that your sprinkler system is efficient and effective in keeping your lawn or garden healthy and well-watered.
