How To Repair Drywall Ceiling DIY
Welcome, intrepid DIY enthusiasts, to the wild and wonderful world of drywall repair! We know what you’re thinking: “Drywall? Ceiling? Oh no, that’s a recipe for disaster!” But fear not, dear reader, for we have a treasure trove of knowledge that will transform you from a clueless ceiling calamity into a bona fide drywall hero.
Picture this: you’re standing in your living room, gazing up at a sight that’s both perplexing and disheartening—a glaring hole in your once-pristine ceiling. Panic starts to set in as visions of sky-high repair bills dance in your head. But before you surrender to despair or resort to covering the hole with an ill-placed poster, let us assure you that fixing your drywall ceiling is not only possible but also surprisingly gratifying.
In the pages that follow, we’re going to whisk you away on an adventure—a journey that will equip you with the skills, tips, and tricks to tackle that menacing void overhead. We’ll arm you with the knowledge of the tools you need, the techniques you’ll employ, and the confidence to tackle your drywall dilemma head-on.
Get ready to unleash your inner handyperson as we dive into the world of patching, spackling, and sanding. But wait, there’s more! We won’t stop there. We’ll also reveal the secrets to achieving a seamless finish, making your ceiling look like it was untouched by human hands.
So, grab your overalls, dust off your sense of adventure, and prepare to be captivated by the captivating tale of how to fix your drywall ceiling. We promise you won’t be disappointed. Our team of drywall wizards has assembled a wealth of wisdom and a pinch of playful charm to guide you every step of the way. Ready? Let’s embark on this remarkable repair quest together!
The Common Causes of Drywall Damage
There are several common causes of drywall damage that homeowners should be aware of, including water damage, cracks, holes, and general wear and tear. Water damage is perhaps the most common cause of drywall damage in both residential and commercial properties.
Whether due to a leaky roof or a burst pipe, water can cause significant damage to your drywall ceiling if left unchecked. Cracks in the drywall are another common problem that homeowners face.
These cracks typically occur due to changes in temperature or humidity levels within your home. Holes in the drywall may be caused by accidental impacts or even pests such as rodents or insects that have infiltrated your home.
General wear and tear can cause damage to your ceiling over time. This includes things like scuffs from furniture or marks left behind by hanging pictures or other decorations.
Maintenance Tips for Your Drywall Ceiling
The key to avoiding costly repairs is proper maintenance and inspection of your drywall ceiling on a regular basis. This includes checking for any signs of water damage, such as discoloration or swelling in the ceiling material. Regular inspections will also allow you to catch any cracks or holes early on before they become larger issues.
For minor repairs, you may be able to use drywall patching techniques to fix the issue yourself. However, for larger repairs or more significant damage, it is best to hire a professional.
In addition to routine inspections and repairs, it is also essential to maintain proper ventilation and humidity levels within your home. This can help prevent the growth of mold and mildew in your drywall ceiling.
A well-maintained drywall ceiling is critical for the structural integrity and safety of your home. By taking the time to inspect and maintain your ceiling regularly, you can avoid costly repairs down the road.
If you do encounter any issues with your drywall ceiling, it is essential to address them promptly and hire professionals if necessary. With proper maintenance and care, your drywall ceiling can last for many years without major problems or expensive repair bills.
Assessing the Damage
Inspect the Damaged Area and Determine its Extent
Before embarking on repairing your drywall ceiling, it is important to carefully assess the damage. Inspect the damaged area and determine its extent to decide which repair technique is best suited for your needs. You should also be mindful of the size of the hole or crack in your ceiling, as it may require a more complex repair process.
Small holes or cracks may be resolved using simple DIY drywall repair techniques such as spackling. However, larger holes or cracks will require more intricate repairs, including cutting out and replacing entire panels of drywall.
In addition, it is important to consider the location of the damage. If the affected area is near an outlet or light fixture, additional precautions should be taken to avoid damaging electrical wiring during repairs.
Identify Any Underlying Issues that May have Caused the Damage
As you assess your drywall ceiling’s damage, make sure you take note of any underlying issues that may have caused it. This could include water damage from a leaking roof or plumbing issue, excessive humidity levels in your home, or structural issues such as improper installation. Identifying and addressing these underlying issues will not only aid in repairing your drywall ceiling but will also prevent further damage from occurring in the future.
If you are unsure what may have caused the damage to your drywall ceiling, we strongly recommend contacting a professional for assistance with identifying and remedying these issues. Once you’ve assessed and identified all necessary details about your damaged drywall ceiling, you can move on to gathering materials and tools needed for repairs.
Gathering Materials and Tools
List All Necessary Materials and Tools Needed for Repairing Drywall Ceiling
Repairing damaged drywall typically requires several materials, such as joint compound/spackle, mesh tape, sandpaper, and paint. Additionally, specific tools will be required to complete the repairs properly.
You will need a utility knife to cut out damaged sections of the drywall ceiling and a putty knife for applying spackle or joint compound. A ladder or step stool may also be necessary for getting up high enough to reach the damaged area.
To avoid any potential hazards during repairs, we recommend using safety equipment such as gloves and goggles. You can find these materials and tools at your local hardware store or home renovation center.
Tips on Where to Purchase High-Quality Materials at an Affordable Price
When looking for materials needed to repair drywall ceilings, it’s essential to consider both quality and affordability. While you may be tempted to purchase cheaper options for materials like joint compound or spackle, quality should always come first.
Cheap material may not offer proper adhesion or coverage, which can result in further damage down the line. We recommend purchasing high-quality materials from trusted brands like Sheetrock or 3M.
These brands are known for their reliability and long-lasting durability, making them ideal options for repairing your drywall ceiling. In addition, you can save money when buying larger quantities of these materials as they are often sold in bulk packages at a reduced cost per unit.
By taking some time to research prices at various retailers in your area before making purchases, you can ensure that you’re getting top-quality products while staying within your budget. Once you have all the necessary materials and tools on hand, it’s important to prepare for repairs by prepping your work area appropriately.
Gathering Materials and Tools
When it comes to fixing ceiling damage, you’ll need a variety of materials and tools to do the job right. The first thing you’ll need is some joint compound, also known as mud.
This is what you’ll use to fill in any holes or cracks in your drywall. You’ll also need some sandpaper, a putty knife, and a paintbrush.
If you’re looking to fix water damage on your ceiling, then you might also need some stain-blocking primer. This will help prevent any water stains from bleeding through your newly painted ceiling.
To repair larger sections of damaged drywall or plasterboard ceiling repair, you may need to remove the damaged section altogether and replace it with a new piece of drywall. To do this, you’ll need a saw or utility knife to cut the new piece of drywall to size.
High-Quality Materials at an Affordable Price
When it comes to purchasing the necessary materials for your drywall repair project, there are a few things that you should keep in mind. Firstly, never skimp on quality – it’s worth spending extra money on high-quality materials as they will last longer and give better results in the long run.
That being said, there are ways to save money when purchasing these items. Look out for deals at your local home renovation stores or search online for discounted prices.
If possible, try buying in bulk – this can save money over time if you plan on doing more DIY home improvement projects. Another great way to save money is by seeking advice from the professionals at these stores before making any purchases.
They can help guide you towards products that are better suited for your needs while staying within your budget. Gathering all necessary tools and materials for drywall maintenance and repair is essential.
Investing in high-quality materials can ensure that your repairs last longer, but there are ways to save money on these items as well. Seek professional advice if you’re unsure what materials to purchase, and always opt for quality over cost when possible.
Preparing for Repair
How to Prepare the Work Area Before Starting Repairs
Before starting your drywall repair process, it’s critical to prepare the work area. You can’t just dive in without planning and preparation.
This is a crucial step that is often overlooked, but it can make or break the success of your home renovation project. The first step in preparing the work area involves clearing the space around your damaged ceiling.
Move furniture, decorations, and anything else that could potentially get in your way to another room. Next, lay down a drop cloth on the floor underneath where you will be working to catch any debris that may fall during the repair process.
Once your space is clear, prep your materials by gathering all the necessary tools and materials for repairing the drywall ceiling. This includes things like spackle or joint compound, sandpaper of varying grits, mesh tape, screws and drills (if panel replacement is required), safety goggles, masks, and gloves.
Safety Precautions that Should be Taken Before Beginning Work
When repairing drywall ceilings or any other home renovation projects involving power tools or construction materials, safety must always come first. Never skip this step in your drywall repair guide or any other tutorial you might follow.
When working with power tools like drills or saws, ensure they are unplugged when not in use to avoid accidents due to electrical shock. Wear goggles and dust masks when sanding down surfaces or cutting through drywall panels, as even small bits of debris can cause serious health problems if ingested into the lungs or eyesight.
Once you’ve gathered all the necessary tools and materials for your DIY ceiling restoration project, make sure there are no children or pets around who could accidentally knock over equipment while you’re using it. Protect yourself by wearing sturdy work boots with non-slip soles (especially if working on a ladder), long-sleeved shirts and pants, and earplugs or noise-canceling headphones if your power tools are particularly loud.
Make sure there is proper ventilation in the room where you will be working. Open windows or use fans to circulate air and reduce the risk of toxic fumes from construction materials accumulating in enclosed areas.
Following these steps for preparing the work area before repairing the drywall ceiling is essential in ensuring a successful DIY home renovation project. Take your time and be prepared to invest a considerable amount of effort into the process of restoring your damaged ceiling back to its former glory!
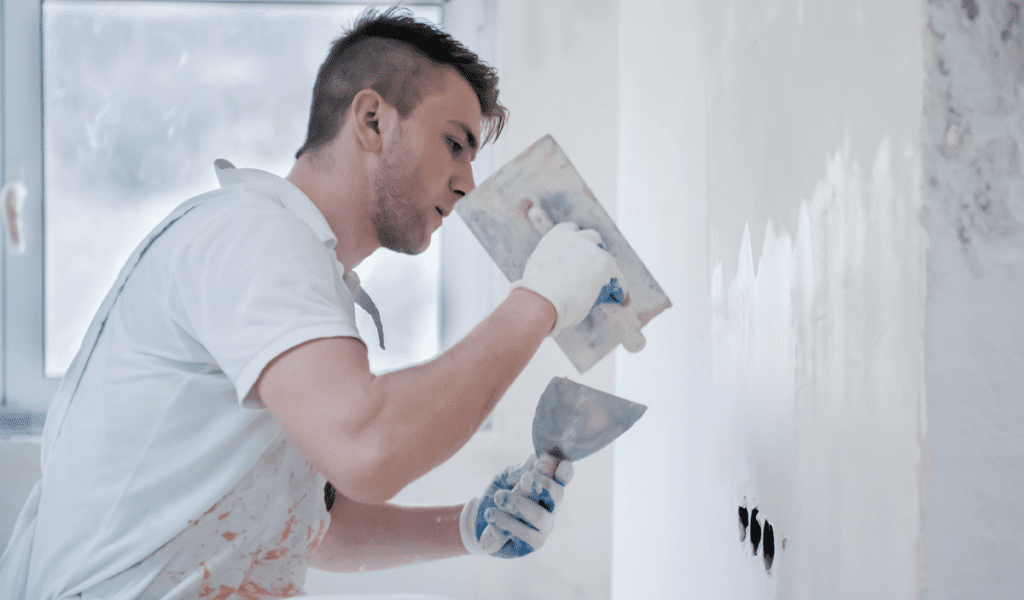
Repair Techniques
How to repair drywall ceiling – Do it yourself effortlessly
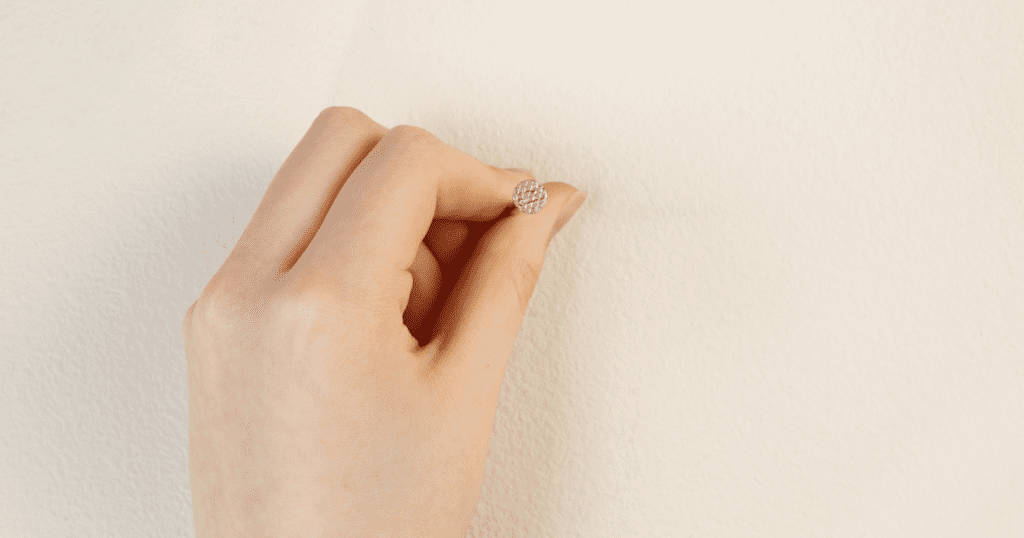
When it comes to drywall maintenance, there are some issues that tend to crop up more frequently than others. One of the most common issues is small holes caused by nails, tacks or screws. This is one of those repairs that can seem intimidating but can be done easily with a little bit of knowledge and effort.
By following these drywall repair tips, you will be able to patch up those small holes in no time. First, make sure that you have all the necessary tools before starting your DIY ceiling restoration project.
You will need a putty knife, sandpaper, spackle or joint compound, and primer paint. Once you have these tools ready, clean the area surrounding the hole using a damp cloth or sponge.
Next, take your spackle or joint compound and apply it over the hole using your putty knife. Make sure that the compound is spread evenly over the hole and slightly raised above the surface of the ceiling.
After applying spackle/joint compound, wait for some time for it to dry completely, then sand down any excess material using fine-grit sandpaper until it’s flush with the surface of your ceiling. Once done with this step, use primer paint to cover up any patches you’ve made on your plasterboard ceiling repair job.
Fixing Cracks in Drywall Ceiling – Your Complete Guide
Cracks in ceilings are often due to changes in temperature causing expansion and contraction in some materials, such as plasterboard used for ceilings. However, cracks can also be caused by water damage repair work on previously installed ceilings. Thankfully repairing cracks follows generally similar steps as patching holes does; It’s not rocket science at all!
The first thing you need to do after identifying cracks is widen them slightly so they are easier to fill effectively. To fix cracks in a drywall ceiling, you’ll need mesh tape, a joint compound, a putty knife, and sandpaper.
Mesh tape is the best option as it provides better stability over time than a regular piece of drywall paper. Once you have your materials ready, apply mesh tape to the crack so that it completely covers the damaged area.
Then use your putty knife to apply the joint compound over the mesh tape. It is important that the joint compound is spread evenly and thick enough to fill all gaps.
Wait for it to dry completely before sanding it down with fine-grit sandpaper until smooth. After this step, use primer paint to cover up any patches you’ve made on your plasterboard ceiling repair job.
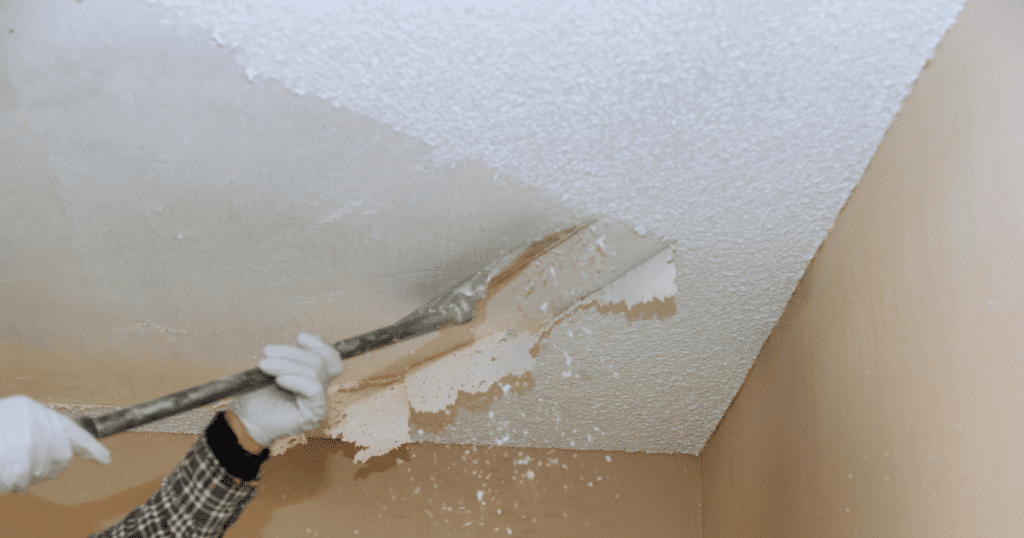
Replacing Damaged Drywall Panels – The Ultimate DIY Guide
If your ceiling has sustained severe damage, like holes larger than 6 inches or water damage has warped panels, then patching will not be an ideal solution. To fix a damaged ceiling of this magnitude, repairing a plasterboard ceiling requires replacing entire panels instead of patching them up.
Here’s how you can complete this DIY drywall repair task: Start by measuring out how much space needs replacement – mark this area with a straight edge or pencil line so that you can accurately cut out the old panel.
Use a saw or cutting tool (depending on thickness) and carefully cut along lines drawn earlier. After successfully removing the old panel, measure and cut out the replacement panel using the same dimensions as the removed one.
Fit the new panel into place, ensuring it sits in snugly by screwing it onto joists using screws, not nails which could dislodge easily. Now that everything has been secured in place, start applying joint compound -spread an ample amount over each seam and smooth out any bumps or ridges using your putty knife before letting everything completely dry.
Once all repairs are complete, finish off by painting restored areas with a coat of primer paint. This will not only give them a fresh new look but also help protect against future damage caused by water or moisture.
Whether you are doing it yourself or calling professionals for drywall repair, it’s important to remember that restoring drywall is not just about fixing surface damage but also requires technical knowledge and proper equipment. So make sure that you understand the techniques and have all the tools ready before jumping in!
Finishing Touches
Sanding to Perfection: The Key to Achieving a Seamless Finish
Congratulations! You have successfully repaired your drywall ceiling using the tips outlined in this Drywall Repair Guide. Now, it’s time for the final step: sanding.
This is where you will smooth out any rough edges and bumps to achieve a seamless finish. Start by using fine-grit sandpaper (220-240 grit) and lightly sand the repaired areas until they are level with the surrounding surface.
Be careful not to sand too hard, as you may damage your repairs. Next, switch to medium-grit sandpaper (120-150 grit) and continue sanding until you achieve a smooth finish.
Don’t forget to also sand any rough patches or bumps on the surrounding area of the ceiling. Once you have finished sanding, wipe down the area with a damp cloth or sponge to remove any excess dust.
And voila! Your drywall ceiling is now ready for priming and painting.
Priming and Painting: Choosing Colors that Match Existing Walls
Now that your drywall ceiling has been repaired and sanded, it’s time to prime and paint. But before jumping straight into painting, it’s important to choose colors that match your existing walls.
When selecting paint colors for your repaired drywall ceiling, consider factors such as the lighting in the room, furniture placement, and overall color scheme. If in doubt, opt for neutral colors such as white or beige that will complement any decor style.
When it comes to priming, make sure to use a high-quality primer designed specifically for drywall surfaces. This will ensure that your paint adheres properly and lasts longer.
Apply one coat of primer using a roller or brush, making sure not to leave any streaks or uneven areas. Once the primer has dried completely, you can move on to painting.
When painting your repaired drywall ceiling, use high-quality paint designed for ceilings. Apply two coats of paint, making sure to allow each coat to dry completely before applying the next.
Proper sanding and careful color selection are essential for achieving a professional-looking finish when repairing your drywall ceiling. Don’t skimp on quality when it comes to primers and paints – investing in high-quality products will save you time and money in the long run.
Frequently Asked Questions
How do you repair drywall on a ceiling?
To repair drywall on a ceiling, start by cutting out the damaged area with a keyhole saw or utility knife and remove any loose or damaged drywall. Then, cut a new piece of drywall to match the size of the removed portion, attach it using screws to the joists, and finish by applying joint compound, smoothing it with a trowel, allowing it to dry, and sanding it smooth.
How do you repair damaged drywall?
To repair damaged drywall, first clean out the damaged area, removing any loose drywall or plaster. Then, apply a patch made of drywall and cover it with drywall tape, followed by joint compound, smoothed out with a trowel, let it dry, and then sand it until smooth.
What is the best drywall for ceiling repair?
The best drywall for ceiling repair is generally 5/8-inch type X drywall due to its added thickness and fire-resistant properties. However, for smaller patches, you could use 1/2-inch drywall, but keep in mind that it should match the thickness of the existing ceiling drywall for a seamless repair.
Can a drywall ceiling be patched?
A drywall ceiling can be patched. The process involves removing the damaged area, cutting a new piece of drywall to match, securing it to the ceiling joists, and applying joint compound and drywall tape to blend the patch with the rest of the ceiling.
Conclusion
Key Points Covered in this Guide
In this guide, we have explored various techniques and tools to help you repair drywall ceiling. We started by assessing the damage to identify the extent of the problem and any underlying issues that may have caused it.
We then went on to gather materials and tools needed for repairing the drywall ceiling. Next, we discussed how to prepare for repair and highlighted safety precautions that should be taken before beginning work.
We then delved into the different repair techniques, such as patching holes in the drywall ceiling, fixing cracks in the drywall ceiling, and replacing damaged drywall panels. We discussed how to finish off repaired areas with sanding, priming, and painting for a seamless finish.
Seek Professional Help
While DIY projects can be a fun challenge, sometimes it is best to leave certain tasks up to the professionals. If you feel unsure about your ability or lack the necessary experience/tools required for repairing plasterboard ceilings or fixing water damage in your ceiling, seeking out professional help may save you time, money and stress.
Repairing plasterboard ceilings can be tricky because they require precision cuts when replacing panels with new ones, which may need expertise from a professional handyman or contractor who has dealt with similar jobs before. Water damage repair is even trickier since you must ensure that every inch of moisture has been eliminated; otherwise, mold can grow behind walls leading to costlier complications later down the line.
Additionally, some people may not own all of the necessary tools required for these types of repairs such as a Drywall T-Square or replacement Drywall Panels which could also increase expenses if one were not careful when purchasing them. The Bottom Line: Don’t hesitate to seek out professional assistance if you are unsure about repairing your drywall ceiling on your own.
Drywall Repair Tips: Save Money and Time
Maintaining and repairing drywall can save time and money in the long run. Regular maintenance of plasterboard ceilings can help prevent damage caused by water, mold or basic wear and tear. Simply inspecting the area to identify any issues before they become severe is a proactive approach that could help avoid costly repairs later in the future.
If you decide to tackle a DIY ceiling restoration, be sure to use high-quality materials and tools to ensure that the job is done properly from start to finish. It will save you money in the long run since poorly repaired areas may need fixing again sooner than expected.
Repairing damaged drywall ceilings requires technique, patience, and precision. However, with our guide alongside a little bit of effort and resources, you can save yourself a considerable amount of money by repairing your plasterboard ceiling on your own while avoiding costly mistakes or accidents.