Avoid Further Damage by Promptly Fixing Water-Damaged Walls
Brief Overview of Wet Drywall Damage
Repairing water-soaked drywall can be a daunting task, but it’s important to address the damage promptly. Water-damaged walls not only look unsightly, but they can also pose health hazards by promoting mold growth. Common issues and solutions for wet drywall include identifying the source of the moisture and patching and drying wet drywall.
Water stains on drywall are also a common problem that needs to be addressed as soon as possible. The longer water sits in your walls, the worse the damage will become.
It’s important to act quickly when you notice any signs of moisture or water damage on your walls. Moisture and mold can weaken the structure of your home and cause health problems for you and your family.
Learn how to repair wet drywall like a pro! This comprehensive guide covers everything from assessing the damage to the finishing touches.
Importance of Repairing Wet Drywall Promptly
Applying a joint compound to repair wet drywall is just one step in restoring wet drywall to its original state after water damage occurs. By repairing your wet drywall promptly, you can prevent further damage from occurring.
This includes preventing mold growth on wet drywall, which can lead to serious health problems for you and your family. Preventing mold growth on wet drywall is especially important if you have young children or anyone with respiratory issues living in your home.
As soon as you notice any signs of moisture or water damage, it’s crucial that you take steps to repair it immediately. Don’t wait until it’s too late!
Seek professional help for extensive wet drywall damage, or follow this DIY guide for smaller repairs. The steps for repairing wet and moldy drywalls are similar but require different techniques depending on how severe the damage is.
In our next section, we’ll show you the steps to dry and repair water-damaged drywall. These best practices for repairing moist drywall will help you restore your walls to their original state and prevent further damage from occurring.
Steps to Dry and Repair Water-Damaged Drywall
Removing water from soaked drywall is the first step in drying techniques for wet drywall. Once the excess water has been removed, it’s important to use fans and dehumidifiers to fully dry out the affected area.
Before you start repairing your wet drywall, make sure you are wearing protective gear such as gloves, goggles, and masks. Turn off electricity to the affected area before starting any repairs.
If necessary, cut out damaged drywall using a utility knife or saw. Removing insulation may also be required if it’s been soaked through.
Once you’ve removed all damaged materials, check for hidden moisture with a moisture meter. It’s important that all moisture is completely removed before repairing any walls.
Our next section covers how to treat mold and mildew that may have grown on remaining drywalls or other surfaces. Remember that preventing mold growth on wet drywalls is key in restoring them back to their original state after water damage occurs.
Treating Mold and Mildew
Mold growth on wet drywall can cause serious health problems if not addressed quickly. Inspect all remaining drywalls and other surfaces for mold growth before beginning any repairs.
To treat mold with a solution of bleach and water, mix one cup of bleach into one gallon of water. Use this solution carefully as bleach can be harmful if not used properly.
Wear gloves and eye protection when using this solution, and make sure the affected area is well-ventilated during treatment. After treating mold with a bleach solution, allow the surface to air-dry completely before continuing with repairs.
In the following section, we’ll discuss how to install new drywall after removing damaged materials. By following these steps for drying and repairing water-damaged drywall, you’ll be on track to restoring your walls to their original state.
Installing New Drywall
Once you’ve removed all damaged materials and treated mold and mildew, it’s time to install new drywall. Measure and cut new drywall to fit the space you need it. Secure new drywall in place with screws or nails.
Next, apply joint compound to seams between the new and existing drywalls. Sand down rough spots before painting over repaired water-damaged drywalls.
By following these steps for removing and treating water-damaged walls, you can prevent further damage from occurring while restoring your home back to its original state. Remember that seeking professional help may be necessary for extensive wet drywall damage or if you’re unsure about any step in the process.
Assessing the Damage:
Inspecting the Affected Area for Signs of Water Damage
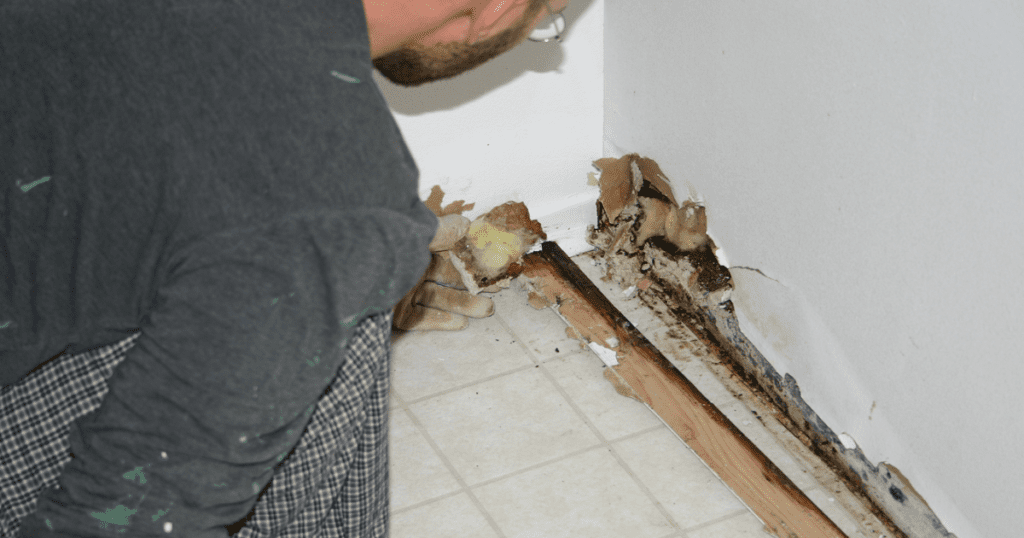
Water damage to drywall can manifest in many different ways, including water stains, peeling paint, and a soft or spongy texture. When assessing the damage, it is important to check every inch of the affected area thoroughly.
Use a flashlight to look for any signs of water damage that might be hidden in dark corners or hard-to-reach places. When inspecting water-damaged drywall, prioritize looking for spots where moisture has been allowed to sit for an extended period.
These areas will likely yield mold growth and structural weakness if left unaddressed. In such cases, you might need professional assistance from experts who can handle removing moisture from soaked drywall while maintaining structural integrity.
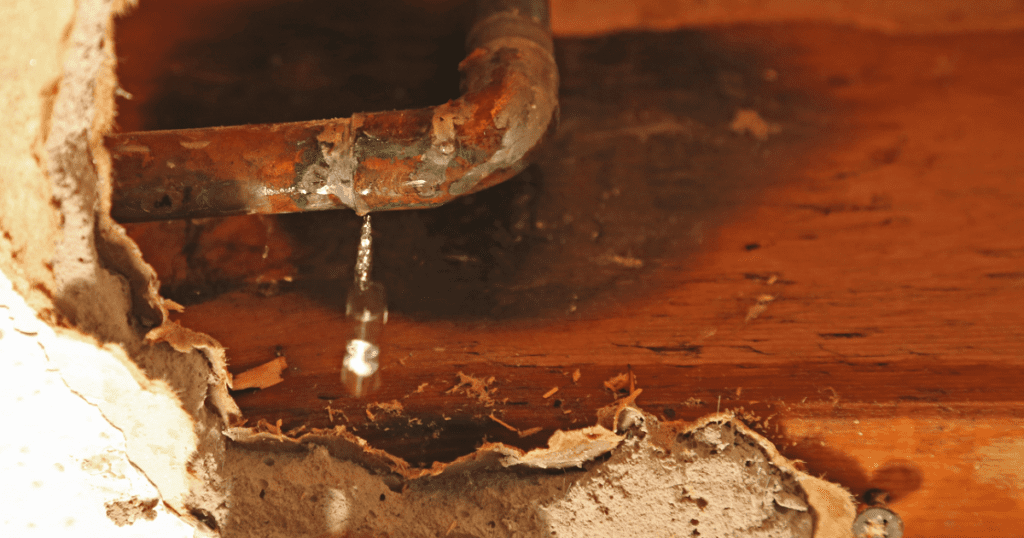
Identifying the Source of the Water Leak or Moisture Buildup
Identifying and addressing the root cause of water damage is crucial in ensuring your repairs are effective in preventing future water damage. Look around the damaged area carefully – Are there any leaky pipes or faulty drainage systems? Is there high humidity around that particular spot?
Or was it simply just an accident that occurred? Once you’ve identified and repaired all leaks and sources of moisture buildup within your home, you can proceed with repairing wet drywall using DIY methods.
However, if you’re unsure of what’s causing your wet drywall problems and want expert advice on how best to tackle such issues, then seeking professional help may be a better option. It’s worth noting that identifying leaks or potential sources of moisture early on will save both money and time down the line.
By remedying problematic areas quickly with proper techniques for repairing moisture-damaged drywall sooner rather than later will increase your chances at restoring wet drywall to its original state. While assessing damaged drywalls might seem like an uphill task, it is essential to carry out this step properly.
Understanding the extent of the damage and identifying the source of water leaks or moisture buildup will make patching and drying wet drywall easier and more effective. Remember, always prioritize safety when handling water-damaged drywall.
Wear protective gear such as gloves and goggles to avoid skin irritation or eye problems. Be cautious about switching off any electricity near wet drywalls to prevent accidents.
Safety Precautions
Wearing Protective Gear – Don’t Take Any Chances
When it comes to repairing wet drywall, safety should be your top priority. This means wearing protective gear such as gloves, goggles, and masks. If you neglect to wear protective gear, you put yourself at risk of inhaling harmful particles and exposing your skin to chemicals or mold spores.
Gloves are essential for protecting hands from cuts and abrasions that can occur while handling damaged drywall. They also provide a barrier against harmful chemicals that may be present during the repairs.
Goggles are crucial for protecting your eyes from dust and debris that can become airborne while cutting or sanding drywall. Don’t underestimate the importance of eye protection during this process.
Masks are necessary for preventing inhalation of harmful particles such as dust and mold spores. Consider investing in a respirator mask if you’re planning on undertaking extensive wet drywall repairs.
Turning Off Electricity – Stay Safe
Another crucial safety precaution when repairing wet drywall is turning off the electricity in the affected area. This prevents electrical shock from occurring while working on the wiring or outlets in the damaged area. Before starting any repairs, turn off the electricity at the breaker box or fuse panel for the room where you’ll be working.
If you’re unsure which circuit controls the area, it’s best to shut off power to the entire house until all repairs have been finished and everything has been checked by an electrician. Remember: safety should never be taken lightly when it comes to DIY wet drywall repair projects.
Seeking Professional Help – When It’s Time To Call In The Pros
In some cases, particularly with extensive water damage or if there is mold present on the walls or ceiling, it may be best to seek professional help for your wet drywall repair needs. Don’t hesitate to call in a professional if you’re unsure of what needs to be done or if you’re not comfortable with undertaking the repairs yourself. Professionals have the experience and specialized equipment necessary for repairing moisture-damaged drywall and restoring it to its original state.
They’ll also know the right steps to take for removing water from soaked drywall, repairing water stains on drywall, and treating mold growth. Remember: while DIY wet drywall repairs can save money, they aren’t always the safest or most effective option.
Best Practices – Follow These Tips For Safe Wet Drywall Repair
To ensure safe wet drywall repairs, it’s important to follow some best practices:
- Always wear protective gear such as gloves, goggles, and masks
- Turn off electricity in affected areas
- Seek professional help for extensive wet drywall damage
- Apply joint compound to repair wet drywall
- Use proper techniques for drying out water-damaged drywall
- Check for hidden moisture with a moisture meter
- Treat mold with a solution of bleach and water
- Install new drywall properly
- Be patient during the drying process
By following these tips, you’ll be able to safely repair your wet drywall without putting yourself at risk of injury or causing further damage.
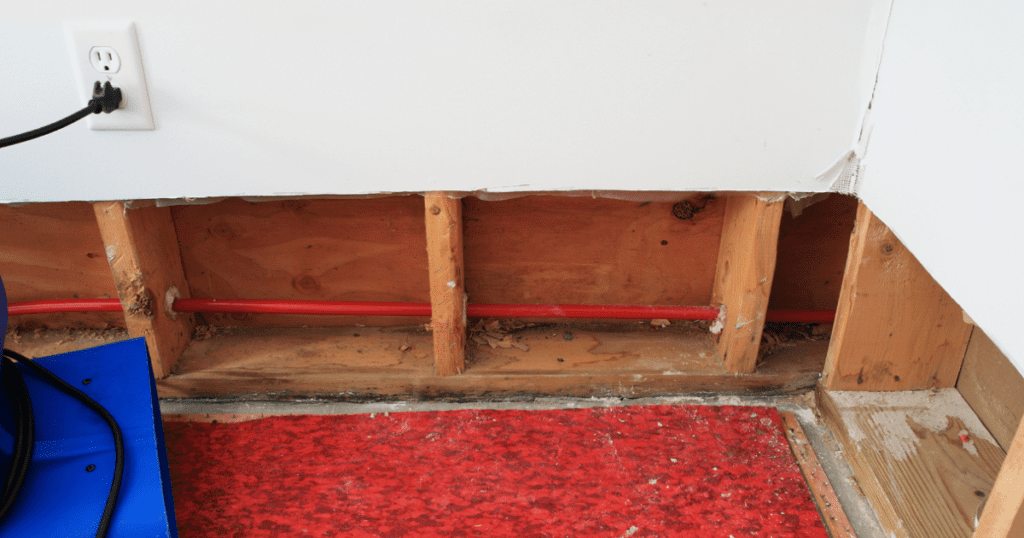
Removing Wet Drywall
Cutting out damaged drywall using a utility knife or saw
There’s nothing that screams “I don’t know what I’m doing” more than hacking away at wet drywall with a dull utility knife or saw. It’s crucial to have the right tools for the job. Otherwise, you’re just going to make matters worse.
Trust me, trying to cut through soggy drywall with a rusty saw is like trying to cut through a steak with a butter knife – it’s just not going to work. Invest in quality tools and save yourself the headache of having to redo the job.
When cutting out damaged drywall, be sure to take your time and make precise cuts. Measure twice, cut once!
You don’t want to accidentally cut through any electrical wires or plumbing pipes hidden behind the drywall. If you’re unsure about what lies behind the wall, turn off the power and water supply before beginning any repairs.
Removing insulation if necessary
One mistake that homeowners often make when repairing wet drywall is neglecting to remove insulation that has also been affected by water damage. Insulation can retain moisture for long periods of time and can cause additional damage if not removed promptly. To remove insulation from wet walls, wear gloves and protective gear as insulation fibers can be an irritant for skin and lungs.
Use a utility knife or scissors to carefully cut away any soaked insulation until all affected areas are exposed. Once you’ve removed any damaged drywall and insulation, it’s critical to begin drying techniques for wet drywall as soon as possible.
The longer moisture remains in the walls, the higher the chance mold growth will occur, leading to potential health hazards. Investing in quality tools like protective gear and moisture meters will save you money down the line by preventing further damage from occurring.
Take your time when removing wet materials from your walls, and don’t take any shortcuts. Your home is worth the effort.
Drying Out the Area
Using Fans and Dehumidifiers to Dry Out the Affected Area: A Foolproof Technique
In the aftermath of a leak or flood, drying out wet drywall is crucial for preventing mold growth and further damage. One of the most effective ways to do this is by using fans and dehumidifiers to increase air circulation and reduce humidity. It may seem like common sense, but it’s amazing how many people overlook this simple technique in favor of more complicated solutions.
When choosing fans, opt for high-velocity models that can move large volumes of air. Place them strategically around the room to create a cross-breeze that hits all affected areas.
Dehumidifiers work great in tandem with fans, as they remove excess moisture from the air. Be sure to monitor them closely and empty their reservoirs frequently.
Checking for Hidden Moisture with a Moisture Meter: Don’t Let Mold Creep Up on You
Moisture meters may seem like an unnecessary expense, but they’re invaluable when it comes to repairing wet drywall. Even after you’ve dried out visible water damage, there may still be pockets of moisture lurking beneath the surface that could lead to mold growth.
A moisture meter allows you to detect hidden moisture levels in walls and ceilings so you can address problem areas before they turn into major mold issues. Simply hold it against your drywall surface and let it measure the amount of moisture present.
If your meter detects unusually high levels of moisture, use fans or dehumidifiers in the area until readings return to normal levels. This extra step will help ensure that your wet drywall repair job lasts longer and stays healthier.
And always remember: when dealing with moldy or water-damaged drywall, safety should be at top priority. Wear gloves and masks while handling damp materials.
Treating Mold and Mildew
Inspecting for Mold Growth on Remaining Drywall and Other Surfaces
Once you’ve taken care of removing the wet drywall, it’s time to turn your attention to any mold that may have grown in the affected area. Even after drying out the space, mold spores can linger in the air and settle on surfaces. If left unchecked, mold can cause serious health issues for you and your family.
First, inspect the remaining drywall and other surfaces in the room. Look for visible signs of mold growth, such as black or green spots or a musty smell.
If you notice any discoloration or suspicious growth patterns on walls or other surfaces, it’s time to take action. Next, use a moisture meter to check for hidden moisture content in drywall.
Moisture readings above 15% indicate that there is still enough water present to support mold growth. In this case, you may need to cut out additional sections of drywall.
Treating Mold with a Solution of Bleach and Water
If you’ve found any visible signs of mold growth during your inspection, don’t panic! It’s possible to remove mold from drywall using a simple solution of bleach and water. To start, mix one part bleach with four parts water in a bucket.
Wear gloves and goggles while handling bleach solution, as it can be harsh on the skin and eyes. Using a scrub brush dipped in the bleach solution, gently scrub away any visible patches of mold on the remaining drywall or other surfaces.
Rinse thoroughly with clean water once done scrubbing. Remember that while bleach is effective at killing surface-level molds like those found on painted walls or tiles, it cannot penetrate porous materials like wood or non-painted drywall where molds have penetrated deep into fibers.
When dealing with extensive wet drywall damage involving large areas covered in mold, it’s best to seek professional help. They can use advanced techniques and equipment to ensure that the mold is properly eliminated.
Preventing Mold Growth on Wet Drywall
The best way to deal with mold growth is to prevent it from happening in the first place. After fixing water-damaged drywall, be sure to take steps to prevent future moisture issues.
Use a dehumidifier or air conditioner in humid areas such as basements or bathrooms. Regularly inspect pipes and appliances for leaks, and fix them immediately if found.
Proper ventilation is also key – make sure your home has adequate airflow throughout. Remember, prevention is always better than cure when it comes to wet drywall repair.
Installing New Drywall
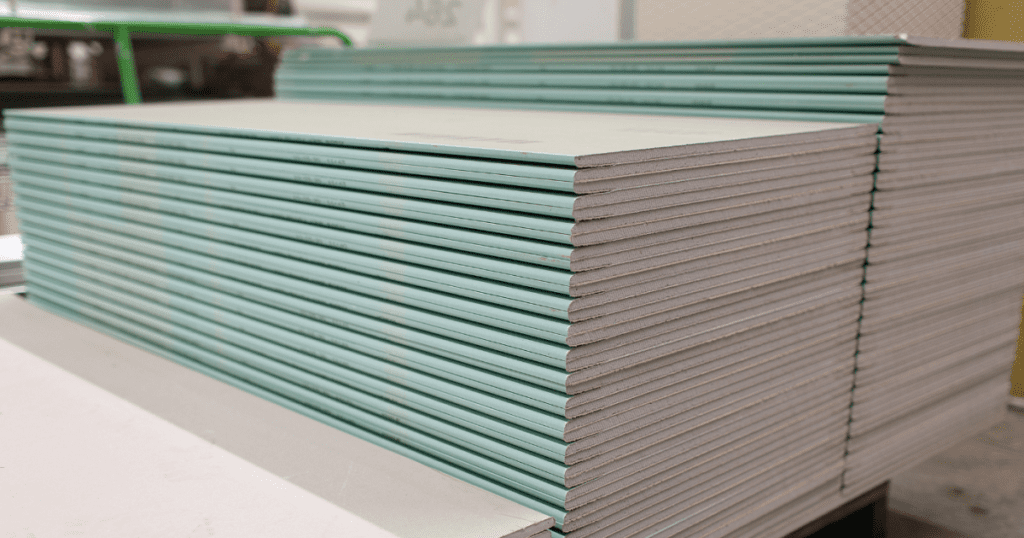
Measuring and Cutting New Drywall to Fit the Space
One of the most important steps in repairing wet and moldy drywall is measuring and cutting new pieces to fit the space. This can be a difficult task, but it’s crucial to ensure that the new drywall fits perfectly into the affected area. If you’re attempting a DIY wet drywall repair guide, make sure you have all of the necessary tools for this step.
First, take precise measurements of the area where you’ll be installing new drywall. Use a measuring tape to determine both width and height and then cut your new piece accordingly using a utility knife or saw.
It’s important that you take your time with this step – rushing through it could result in an improperly sized piece of drywall that will need to be re-cut. When cutting your new piece of drywall, be mindful of any outlets or fixtures that may be present in the affected area.
You’ll need to make sure that these are accounted for when taking measurements and making cuts. Additionally, make sure that any edges or corners are smoothed out so they don’t cause issues with installation later on.
Securing New Drywall in Place with Screws or Nails
Once you’ve properly measured and cut your new piece(s) of drywall, it’s time to secure them in place. Depending on the size of the damaged area, you may need one or multiple pieces of new drywall. To secure your newly cut pieces into place, use screws or nails along all edges.
When choosing screws/nails, it is best practice to select ones that are at least 1 inch longer than the thickness of both old and new sheets combined so they can provide adequate support for heavy installations such as frames for mirror cabinets, etc. Start by screwing/nailing into each corner first and then add additional screws/nails every 6-8 inches apart. Make sure that all screws/nails are flush with the surface of the drywall – this will ensure that your joint compound adheres properly.
When installing new drywall, it’s important to remember that thicker drywall is not always better. In some cases, thicker drywall can actually make it more difficult to install and may not provide the best results.
Standard thicknesses for residential applications are usually 1/2 inch or 5/8 inch. Ultimately, the thickness you choose will depend on your specific needs.
If you’re feeling unsure about how to repair wet drywall effectively or have any questions about this process, consider seeking professional help. A skilled contractor can help you assess the extent of damage and provide recommendations for repairs that will last for years to come.
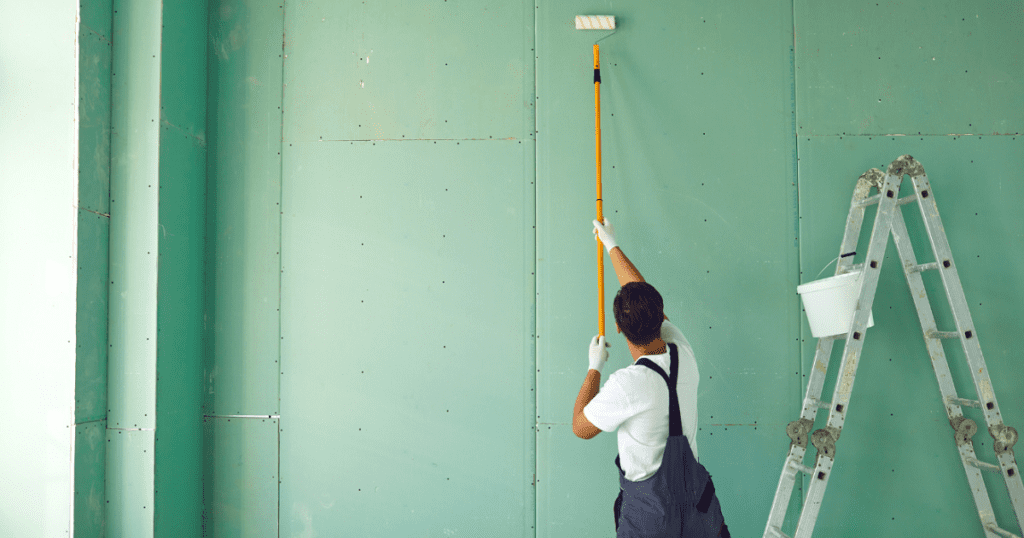
Painting Over Repaired Water-Damaged Drywall
After securing new pieces of drywall in place and sanding them down, it’s time to paint over your repaired water-damaged drywall. While this step might seem simple enough, there are several things you’ll need to consider to ensure a successful paint job.
First, make sure that all joint compound is completely dry before painting – this typically takes at least 24 hours but may take longer depending on the humidity level in your home. Next, apply a coat of primer before painting over your repaired area; this will ensure that your paint adheres properly and provides an even finish throughout.
When selecting paint colors for repaired water-damaged drywall, it’s important to choose a color that matches closely with existing walls or ceiling in order to maintain consistency throughout the room – even slight color variations can be noticeable once applied! Additionally, if you’re planning on applying multiple coats of paint (which is recommended), make sure each coat dries fully before applying another layer.
Installing new drywall can be a daunting task, but it’s an essential step in effectively repairing water-damaged drywall.
Be sure to take precise measurements, cut with care, and secure new pieces in place using screws or nails. And once you’ve completed your repairs, don’t forget to prime the area before painting for a flawless finish!
Finishing Touches
Applying joint compound to seams between the new and existing drywall
After removing and replacing the damaged drywall, it’s time for the next step in repairing water-damaged drywall. This is where you apply joint compound to the seams between the new and existing drywall. But let’s be honest, if you’re not a professional, this process can be a frustrating nightmare.
You apply too much joint compound to one spot and not enough in another. You’ll end up with an uneven surface that looks like it’s been patched together by an uncoordinated toddler.
The DIY wet drywall repair guide will tell you to follow specific steps, but what they don’t tell you is that applying joint compound is an art form. To do this well, it takes patience, a steady hand, and some experience.
So here’s my advice: if you’re unsure of your skills or lack experience with applying joint compound to wet drywall repair methods after water damage has occurred, seek professional help immediately! Don’t waste your time trying to fix something that will only look worse when finished.
Sanding down rough spots
Sanding down rough spots on repaired water-damaged drywall is where most people breathe a sigh of relief, but honestly, sanding down these areas can be an equally frustrating experience as applying joint compound! First of all, make sure that all of the joints are completely smooth before starting the sanding process. If there are any bumps or raised areas left over from applying the joint compound – which, let’s face it, there always are – then they need to be sanded first using fine-grit sandpaper.
The same goes for any areas where paint has lifted due to water damage restoration techniques used or paint brush strokes showing through even after drying techniques for wet drywall have been applied. You need to sand them down until they’re flush with the surrounding area.
The best practices for repairing moist drywall recommend using coarse sandpaper first to remove any high spots and then switching to finer-grit sandpaper to smooth out the surface. However, use caution when doing so as applying too much force when sanding down rough spots can cause further damage.
Painting over the repaired area
It’s time to paint over the repaired water-damaged drywall, which should be the easiest part of the process. But let’s face it; there are few things more frustrating than painting over an uneven surface due to poor joint compound and bad sanding techniques!
To avoid this situation, be sure that your repaired area is level and smooth before painting. You may need more than one coat of paint if you have applied too much joint compound or sanded down too far in some areas.
When painting over repaired water-damaged drywall, make sure to use a quality primer first before applying your topcoat. This will help ensure an even finish and prevent future water stains from showing through.
Remember: repairing water-soaked drywall isn’t just about patching and drying wet drywall; it’s also about making sure that everything looks seamless when finished! If you’re not confident in your abilities or don’t have time for DIY wet drywall repair methods after water damage has occurred – seek professional help immediately!
Frequently Asked Questions
Can drywall be saved if it gets wet?
Drywall can sometimes be saved if it gets wet, depending on the extent of the water damage. Quick action is crucial to dry the affected area thoroughly and address any potential issues, such as mold growth or structural damage.
How do you cover water-damaged drywall?
To cover water-damaged drywall, the damaged area should be repaired first by cutting out the affected portion, replacing it with new drywall, and then finishing the surface with joint compound, sanding, and priming before applying paint or other wall coverings.
How long does wet drywall take to dry?
The drying time for wet drywall can vary depending on factors such as the extent of moisture, humidity levels, ventilation, and the size of the affected area. In general, it can take anywhere from a few days to several weeks for wet drywall to completely dry.
Can you just paint over the water damage?
It is not advisable to simply paint over water damage on drywall. It is essential to address the underlying issue, repair the damaged area, allow it to dry thoroughly, and then properly prepare the surface before applying paint.
What happens when water gets on drywall?
When water gets on drywall, it can cause a range of issues, such as discoloration, warping, sagging, softening, or even mold growth. If left untreated, water-damaged drywall can compromise the structural integrity and aesthetics of the wall.
Do I need to replace the drywall that got wet?
Depending on the severity of the water damage, you may need to replace the drywall that got wet. Extensive damage, such as significant swelling, crumbling, or mold growth, may require the removal and replacement of the affected drywall to ensure a safe and structurally sound environment.
Conclusion
Restoring wet drywall to its original state is no walk in the park. In fact, it can be a huge undertaking that requires time, money, and effort. However, if you neglect to fix water-damaged drywall as soon as possible, you’re only inviting more damage down the road.
Wet drywall is an invitation for mold growth and structural damage that can compromise your home’s integrity. Drying techniques for wet drywall and tips for fixing water-damaged drywall are all helpful but will only work if you act quickly.
The longer water sits on your walls or ceiling, the harder it becomes to repair them, not to mention the higher risk of developing mold that could cause health problems for you and your family.
While there are many wet drywall repair methods available online, there are some instances when seeking professional help is necessary. Removing water from soaked drywall or preventing mold growth on wet drywall requires expertise and specialized equipment that most homeowners don’t have access to. Applying a joint compound to repair wet drywall or repairing water stains on drywall may sound easy enough in theory but can be challenging in practice without proper experience.
Techniques for repairing moisture-damaged drywall involve a lot of steps that require attention to detail and knowledge of best practices for repairing moist drywalls. In cases where extensive wet drywall damage has occurred, seeking professional help should be a priority rather than an option.
Professional contractors have the skills and tools needed to patch and drying wet drywalls effectively while minimizing further damage. Whether it’s fixing water-damaged walls or painting over repaired water-damaged walls, homeowners should take every step possible towards addressing moisture buildup as soon as possible before it leads to more significant issues.
Remember, prevention is better than cure. The sooner you notice the damage, the better.