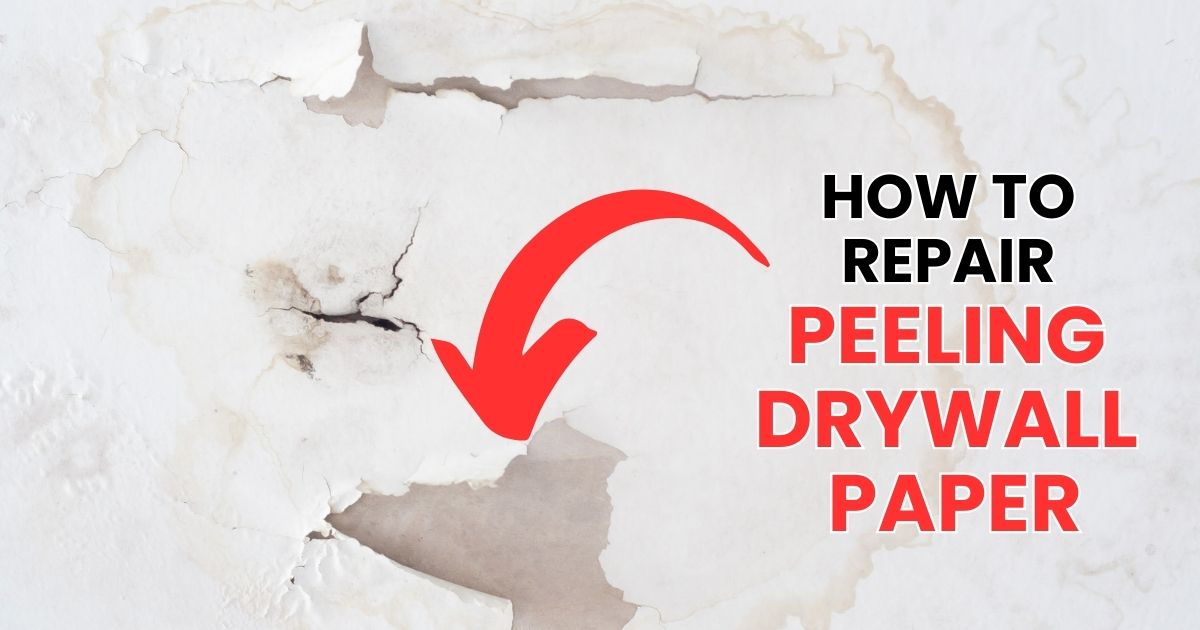
The Problem:
Drywall is a versatile and cost-effective material used in most modern homes. But when peeling drywall paper starts to show, it can create an eyesore that can quickly ruin the aesthetics of your walls. The causes may vary, but the results are always the same – unsightly patches of peeling paper that make your walls look like they’ve been through a warzone.
Learn how to repair peeling drywall paper in detailed steps. Follow our expert guide to restore your walls like a pro!
Troubleshooting common issues with peeling drywall paper and their solutions
Peeling drywall paper can be caused by many factors, including water damage, improper installation, or simply aging. Whatever the cause may be, one thing is for sure – it needs to be fixed before it gets worse.
Water damage is one of the most common culprits behind peeling drywall paper. If you suspect this might be the issue, start by checking for leaks and fixing them immediately.
The Importance:
Repairing peeling drywall paper isn’t just about aesthetics; it’s about maintaining the integrity of your walls. When left unchecked, damaged areas can become breeding grounds for mold and mildew which can further deteriorate your walls and compromise their structural integrity.
Importance of proper preparation and finishing for long-lasting repairs on drywall
Proper preparation is key to ensuring long-lasting repairs on your drywalls. Before starting any repair work, remove any loose or crumbling areas around the affected area using a putty knife or sandpaper. This will help create a stable surface for the new adhesive to stick.
Adhesive failure on drywall paper
Adhesive failure can occur when there’s not enough paste or joint compound applied between layers of wallpaper or if there’s moisture present during installation. This causes the adhesive to break down, leading to peeling and detachment of the paper.
Techniques:
There are several techniques for repairing peeling drywall paper, but choosing the right one depends on the extent of the damage. If you’re dealing with a small area, you may be able to get away with simply applying a fresh layer of adhesive. However, if the damage is more extensive, you may need to replace entire sheets of drywall.
Patching and blending techniques for peeling drywall paper
Patching and blending techniques can help ensure that your repair work matches seamlessly with your existing walls. Once you’ve applied new adhesive or replaced sheets of drywall, sand down any rough edges using fine-grit sandpaper until smooth. Proven techniques for achieving professional-looking paper repairs on drywall
Achieving professional-looking repairs involves careful attention to detail. When applying new sheets of drywall or wallpaper paste, make sure to smooth out any bubbles or wrinkles, as these can create unsightly bulges once they’re dried. Peeling drywall paper doesn’t have to be a permanent eyesore in your home.
With proper troubleshooting and repair techniques – including preparation and finishing – it’s possible to achieve seamless repairs that last for years. Don’t let damaged walls ruin your home’s aesthetic appeal – take action today!
Assessing the Damage
Examining the Extent of Damage
The first step to repairing peeling drywall paper is assessing the damage. You need to figure out how much paper is peeling off and whether there are any underlying issues that may have caused the damage. This will help you determine the scope of work required to fix the problem.
Start by examining the area where the paper is peeling off. Use a putty knife or scraper to gently scrape away any loose or peeling paper until you reach a stable surface.
Be careful not to remove too much paper or damage the underlying drywall. Once you’ve exposed a solid surface, you can begin inspecting for potential causes of peeling.
Detecting Underlying Issues
Peeling drywall paper can be caused by various factors, such as high humidity levels, water damage, poor installation, or adhesive failure. Check for signs of mold or water stains on your walls; this could indicate water damage that needs addressing before proceeding with repairs. Also, check for adhesive failure on drywall paper around light switches and power outlets since these areas are prone to stress from frequently applied pressure, and adhesives may loosen over time.
Poor installation jobs also lead to loose paper on drywall; if your walls were not properly prepared before applying wallpaper paste, it could result in adhesive problems where wallpaper cannot maintain proper grip, causing it to peel. Identifying underlying issues will help prevent recurring problems with future repairs after fixing current damaged areas.
The Importance of Proper Preparation and Finishing for Long-Lasting Repairs on Drywall
It’s essential that you prepare carefully when repairing peeling drywall paper so that your repair lasts longer without constant upkeep and re-repairs. Make sure that you have all the necessary tools and materials, like sandpaper and primer, among others, ready by gathering them in one place and then covering surrounding areas with drop cloths or plastic to protect from dust and debris.
After repairing the damaged area, finish it properly to ensure it blends seamlessly with existing walls. Sand down any rough spots to create an even surface, prime the area before painting and if possible, use the same paint as on existing walls to avoid color discrepancies after repairs.
Expert Tips and Tricks for Seamless Drywall Paper Repair
Mastering peeling drywall paper repair might seem challenging, but it’s not that hard with the help of an instructional guide. To achieve professional-looking paper repairs, follow these tips:
- Use a wallpaper paste that is designed for drywall paper repairs.
- Apply an even layer of paste on both sides of the repaired paper to help it adhere seamlessly.
- Use sandpaper or a putty knife when smoothing out edges so that you don’t damage the underlying drywall or cut through new paper.
- Avoid over-sanding since this can create grooves in your wall that will be hard to repair
- Take your time drying between coats of joint compound before moving on to the next step
By following these easy-to-follow instructions for patching and blending peeling drywall paper, you’ll have excellent results every time.
Tips for Choosing the Right Materials and Tools for Drywall Paper Repair
When repairing peeling drywall paper, it’s important to choose materials and tools carefully. Here are some tips:
- Choose a high-quality joint compound that dries quickly so you can finish faster
- Use sandpaper with a fine grit so you don’t damage existing walls but still smooth out rough spots
- Select a primer-paint combination suitable for both old and new surfaces in order to get uniform color palettes throughout your home
- Invest in a good quality wallpaper adhesive, such as vinyl, over standard glue
By selecting appropriate tools/materials, repairing loose or peeling paper on drywall will be a lot easier, and the results will last longer.
Troubleshooting Common Issues with Peeling Drywall Paper and Their Solutions
Peeling drywall paper can be frustrating to fix, especially if you’re not familiar with common issues that may arise during repairs. Here are some solutions to common problems:
- If the new wallpaper is not sticking properly, try reapplying the paste or using a different adhesive
- If sanding down rough spots causes damage to existing walls, apply extra layers of joint compound for added strength and smoothness
- Always wait for joint compound layers applied on damaged wall areas to dry completely before moving on to the next step. Rushing the process can cause worse damage.
By following these proven techniques for achieving professional-looking paper repairs on drywall, you’ll be able to prevent and fix any peeling issues that arise in your home.
Preparing for Repair
Gather the Necessary Tools and Materials
When it comes to repairing peeling drywall paper, having the right tools and materials is essential. You’ll need a putty knife, sandpaper, joint compound, primer, paint, and of course, replacement drywall paper.
Depending on the size of the damaged area, you may also need a utility knife or scissors to cut the new paper to size. When selecting your materials, be sure to choose high-quality products for optimal results.
Skimping on materials can lead to a subpar repair job that won’t last long. Don’t be afraid to spend a little extra money on top-notch supplies – it will pay off in the end.
Protect Surrounding Areas from Dust and Debris
Before you begin repairing peeling drywall paper, it’s crucial to protect surrounding areas from dust and debris. Cover floors with drop cloths and use plastic sheeting or painter’s tape to seal off any vents or openings in the room.
This step may seem tedious but trust us – it’s worth it. Sanding joint compounds can create a lot of dust that will settle on any exposed surfaces if not properly contained.
This dust can be difficult (and time-consuming) to clean up once it settles. Take preventative measures now so you don’t have to deal with an even bigger mess later!
Prevent Further Damage During Repair
While repairing peeling drywall paper is necessary for maintaining your walls’ integrity, it’s also crucial not to cause any further damage during the process. Be gentle when removing loose or peeling paper with your putty knife – you don’t want to accidentally remove more than necessary.
Additionally, take care when smoothing out edges or applying joint compound over exposed drywall; too much pressure can create dents or other imperfections in the surface. Remember, taking your time and being careful during the repair process will ultimately result in a better outcome.
Choose the Right Time to Repair Peeling Drywall Paper
Timing is everything when it comes to repairing peeling drywall paper. You don’t want to start the repair process if there’s still water or moisture present on or in the wall, as this can compromise the integrity of the repair and cause more problems down the road.
Instead, wait until any underlying issues – such as leaks or humidity – have been resolved before attempting to fix peeling drywall paper. This will ensure that your repair job lasts for as long as possible.
Don’t Be Afraid to Ask for Help
If you’re new to DIY home improvement projects or simply unsure about how to properly repair peeling drywall paper, don’t be afraid to ask for help! Watch a visual walkthrough video tutorial online or consult a professional for advice.
Remember, mistakes can be costly (and frustrating!), so it’s always better to take your time and do things right from the start. With a little patience and attention to detail, you’ll have professional-quality repairs that will last for years to come.
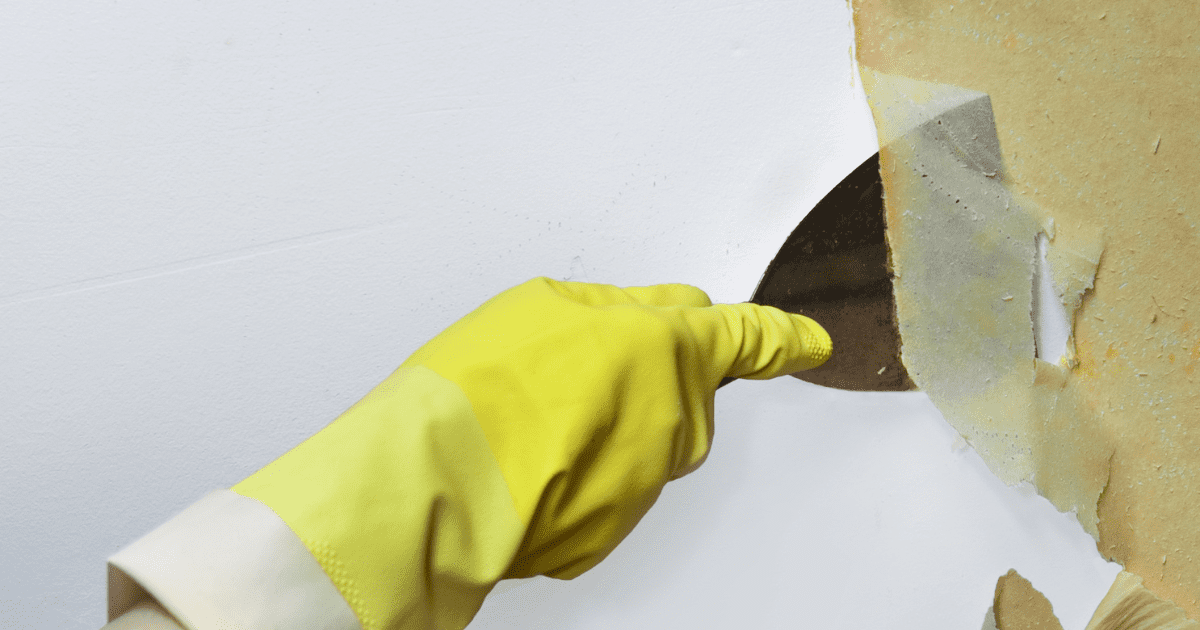
Removing Loose Paper
Scraping Away the Peeling Drywall Paper
When it comes to repairing peeling drywall paper, the first step is to remove any loose or peeling paper until you reach a stable surface. This job requires a putty knife, and you’ve got to be careful not to remove too much paper or damage the underlying drywall in the process. Why is it essential to be cautious while scraping away loose paper?
Well, removing too much of it can compromise the structural integrity of your drywall. You don’t want a hole in your wall instead of a small patch of missing paper!
The Importance of Using the Right Tool for Peeling Drywall Paper Repair
While we’re on this topic, let’s talk about tools for a moment- there are many types of putty knives out there! However, not all are created equal when it comes to repairing peeling drywall paper. A flexible blade putty knife can make all the difference when scraping away loose paper, especially if you have slightly uneven or curved surfaces.
You might think that any old putty knife will do since you’re just using it for scraping. However, investing in a high-quality flexible blade putty knife ensures that you won’t cause more damage than necessary while working on your project.
Taking Precautions While Removing Peeling Drywall Paper
One thing I cannot stress enough is that patience is key when scraping away peeling drywall paper. It’s essential not to rush through this step since doing so can cause more harm than good. Applying too much pressure to your scraper can lead to gouging and damaging the wall underneath.
Take breaks as needed and use caution when moving along edges. Taking these precautions will ensure that you’re only removing what’s necessary and leaving behind stable walls ready for the next step in your drywall paper repair project.
How to Avoid Common Mistakes When Scraping
Another common mistake people make when scraping away peeling drywall paper is going too quickly. You might think that this is an easy task and that you can finish it in no time, but being in a hurry never helps.
Instead, take a moment to assess the situation and plan out how much pressure is needed. In addition, always scrape in the direction of the damage so that you don’t accidentally cause more problems by pulling on loose paper or damaging what’s underneath.
Smoothing Out Edges: Ensuring Smooth Adhesion for New Paper
Sanding Away Imperfections
Techniques for peeling drywall paper repair are not always common knowledge. One important step that is often overlooked is sanding the edges of the damaged drywall paper. Sanding away any rough spots will help ensure that the new paper adheres smoothly and that there are no bumps or ridges on the surface of the wall.
If you skip this step, you could end up with an uneven surface on your repaired wall, which can cause problems with adhesion in the future. When sanding, start with a coarse-grit sandpaper (around 120-grit) to smooth out any large imperfections.
Be sure to work carefully and slowly so as not to damage the underlying drywall or remove too much of the existing paper. Once you have smoothed out any rough areas, switch to finer-grit sandpaper (around 220-grit) to create a smoother finish.
Drywall Taping Techniques
Professional methods for repairing and restoring peeling drywall paper often involve using drywall tape in conjunction with joint compound. When applied correctly, this technique creates a seamless finish over any repaired areas.
Firstly, apply joint compound evenly over the damaged area until it is slightly raised above the level of surrounding walls. Then apply self-adhesive mesh tape over it at an angle along where you want it reinforced.
Using a joint knife tool, take some more compound over mesh tape till it looks smooth and unnoticeable. Once this coat has dried overnight, then repeat the same process again by applying a second layer of compound followed by sanding off the excess after it’s dried completely.
The Importance of Proper Sanding Technique
Tips and tricks for professional-quality drywall paper repair emphasize proper sanding technique as essential when smoothing out edges. Keep in mind that sanding excessively could compromise the integrity of the drywall and create more problems than it solves, like exposing the gypsum core of drywall that should not be exposed since it is too soft for painting.
Therefore, it is important to only sand the paper as necessary to create a smooth, flat surface. To make sure that you have sanded enough but not too much, hold a light source (like a flashlight or work light) against the wall at an angle and inspect the surface while you are sanding so you can ensure that you have removed all rough spots.
Finishing Touches for Seamless Paper Repairs
Proper preparation and finishing are key components for long-lasting repairs on drywall paper. Techniques like smoothing out edges are important, but they won’t mean much if you aren’t finishing up with quality materials. Be sure to use high-quality primer and paint to cover your repaired area once finished with the sanding process thoroughly.
A helpful tip is using a primer specifically designed for use with joint compound repairs; this will provide better adhesion of paint later on. If done correctly, your peeling drywall paper repair will be almost invisible once painted over – just like new!
Long-Term Durability of Paper Repairs on Drywall
Drywall repair isn’t something most people look forward to doing – especially when it comes to repairing peeling paper on drywall. However, making sure that your repairs last as long as possible through techniques like smoothing out edges will prevent future headaches down the road.
By taking time to properly smooth out any rough spots using sandpaper technique and properly prep surface before painting, your repaired walls will stay pristine for years without further issues popping up again. The end result will be seamless and professional-looking repairs that blend in perfectly with surrounding walls – even if they were damaged earlier!
Applying Joint Compound: The Savior of Peeling Drywall Paper
The Life Saver for Damaged Drywall
Peeling drywall paper is a common issue in residential and commercial properties that can be easily addressed with a joint compound. This versatile repair material is a must-have for any DIY enthusiast or professional contractor aiming to restore the integrity of damaged walls.
Applying joint compound over any exposed drywall is an essential step in repairing peeling drywall paper as it guarantees that the surface will be smoother and more stable, ready to receive new paper. Before applying joint compound, ensure the damaged area is clean and free of debris.
Using a putty knife, apply a thin layer of joint compound over the exposed drywall surface until it covers the entire area. Use smooth and even strokes for seamless blending with the surrounding wall texture.
Avoid leaving bumps or ridges on the surface, as they could make it difficult to join new paper seamlessly. While applying joint compound, ensure that you don’t use too much pressure on your putty knife as it could damage underlying drywall or create additional cracks in your walls.
Instead, glide the knife smoothly over each section, making sure you spread enough joint compound mixture evenly across each section. Once you have covered all exposed areas with a consistent layer of joint compound, allow it to dry completely before moving on to other steps in repairing peeling drywall paper.
Depending on factors such as humidity levels and room temperature, drying times may vary from one hour to several days. When drying time has elapsed (you can check by lightly pressing down on the applied mixture), sand down any rough spots using fine-grit sandpaper until you achieve smoothness across every inch of both old and new surfaces.
Pro tip: If you are looking for optimal results from your repair job, use a primer after finishing up applying the joint compound. Primers are essential for minimizing the visual contrast between repaired surfaces and the surrounding walls, giving you a seamless appearance.
A joint compound is one of the most vital tools in your arsenal when it comes to repairing peeling drywall paper. Its versatile properties make it useful for all kinds of drywall repairs, including filling cracks and holes, smoothing uneven surfaces, and concealing joint tape.
Applying joint compound on peeling drywall paper is an essential step that guarantees successful repair outcomes. It’s a quick fix that saves you money while ensuring that your walls maintain their original condition and strength.
Applying New Paper
Cutting the New Drywall Paper to Size
Now that you’ve removed the loose paper and smoothed out the edges, it’s time to cut a piece of new drywall paper. This is where your precision cutting skills come in handy. You want to make sure that the new piece of paper is slightly larger than the damaged area so that it can overlap and adhere properly.
Don’t cheat and cut it too small – this will only lead to more peeling down the road. Take your time, measure twice, and cut once.
Applying Adhesive on Both Sides
Once you have your new piece of drywall paper cut to size, spread an even layer of adhesive on both sides. This can be wallpaper paste or joint compound – whichever you prefer.
Be generous with the adhesive, but not too much that it drips off the sides. You want enough to ensure a strong bond between the old and new paper.
Smooth Out Any Bubbles or Wrinkles
This step is crucial for achieving a seamless repair job. Place the new piece of paper over the damaged area and gently smooth out any bubbles or wrinkles with a putty knife or roller. Make sure there are no gaps between the old and new paper – this will only lead to more peeling down the road.
Let It Dry Completely
After applying the new drywall paper, let it dry completely before moving on to priming and painting over it. This usually takes about 24 hours, depending on humidity levels in your home. Resist touching or bumping into this area until after it has dried completely.
The End Result: A Seamless Repair Job
By following these steps for repairing peeling drywall paper, you can achieve a professional-quality repair job that blends in seamlessly with the rest of your walls. No more unsightly peeling paper or embarrassing spots on your walls. With a little bit of patience and DIY home improvement, you can save yourself the hassle and expense of hiring a professional to fix the problem for you.
Finishing Touches: Achieving Professional and Long-lasting Repairs
Repainting after Paper Repair on Drywall: Tips and Tricks for a Seamless Finish
After repairing peeling drywall paper, the last step is to repaint the area to seamlessly blend it in with the rest of the wall. Start by applying a high-quality primer over the repaired area. This will help ensure that the new paper and joint compound are properly sealed and that the paint adheres evenly.
Once the primer has dried, use fine-grit sandpaper to smooth out any rough spots or uneven surfaces around the repaired area. This step is crucial in achieving a professional-looking finish as it helps create an even surface for painting.
When choosing your paint color, consider using a shade that closely matches your existing wall color. This will help ensure that any slight variations in texture or sheen between old and new surfaces are less noticeable.
Apply 2-3 coats of paint over the repaired area, making sure to blend it evenly with surrounding areas. Allow each coat to dry completely before applying another one.
And voila! With these tips and tricks, you can achieve a seamless finish that looks like nothing ever happened.
Drywall Repair: Importance of Proper Preparation and Finishing for Long-lasting Repairs
The key to achieving long-lasting repairs on peeling drywall paper lies in proper preparation and finishing techniques. Before repairing any damaged areas, it’s crucial to assess the extent of damage first. Determine if there are any underlying issues, such as water damage or mold growth, before proceeding with repairs.
Once you’ve identified all problem areas, gather all necessary tools, including a putty knife, sandpaper, joint compound, wallpaper paste/primer/paint (depending on repair type), drop cloths, or plastic sheeting (to protect surrounding areas from dust/debris), etc. After removing the loose or peeling paper, smoothing out any rough edges, and applying joint compound to exposed areas, it’s crucial to allow everything to dry completely.
This will ensure that the new paper adheres properly and that any primer/paint applied won’t crack or peel later on. When painting over the repaired area, make sure to apply a high-quality primer first.
This will help seal in the new paper and joint compound, ensuring that your paint adheres evenly. Apply 2-3 coats of paint over the repaired area, making sure to blend it evenly with surrounding areas.
Allow each coat to dry completely before applying another one. By taking your time during the preparation and finishing stages, you can achieve long-lasting repairs that look professionally done.
Adhesive Failure on Drywall Paper: Preventive Measures for Minimizing Peeling
One of the main causes of peeling drywall paper is adhesive failure. This occurs when the wallpaper paste used during installation doesn’t adhere properly to the drywall surface. To prevent this from happening in future repairs or installations:
Choose a high-quality wallpaper paste specifically designed for drywall surfaces. Make sure walls are properly cleaned and primed before installation.
Allow adequate drying time between each layer (i.e., priming, wallpaper paste application). Avoid using too much water when mixing wallpaper paste, as it can weaken adhesive strength.
Ensure proper temperature and humidity levels during installation (typically around 70°F with 45-55% humidity). By following these preventive measures, you can minimize future instances of peeling drywall paper caused by adhesive failure.
Easy-to-follow Instructions for Patching and Blending Peeling Drywall Paper
Patching and peeling drywall paper is a straightforward process that anyone can do with a little patience and attention to detail. Here’s how:
Cut a piece of new wallpaper slightly larger than the damaged area Apply wallpaper paste to both the drywall and the new paper
Place new paper over the damaged area, smoothing out any wrinkles/bubbles with a putty knife Let dry completely before sanding down any rough spots
Apply primer and paint over repaired area, blending it in with surrounding areas By following these easy-to-follow instructions, you can achieve professional-looking repairs on peeling drywall paper in no time.
Frequently Asked Questions
Can you repair drywall paper?
You can repair drywall paper. By using joint compound and applying new layers of paper or mesh tape, you can effectively repair damaged or torn drywall paper.
Why is drywall paper peeling?
Drywall paper can peel due to various factors such as moisture, poor adhesion, or aging. Insufficient primer, high humidity, or improper installation can contribute to the peeling of drywall paper.
Can you sand drywall paper?
Sanding drywall paper is possible, but it should be done with caution. Lightly sanding the surface can smooth out imperfections, but excessive sanding can damage the paper layer and compromise the integrity of the drywall.
How do you hide peeling drywall tape?
To hide peeling drywall tape, you can first remove any loose or damaged tape and then apply a new layer of joint compound over the area. After sanding and priming, you can blend the repaired section with the surrounding wall.
Can you paint over paperless drywall?
You can paint over paperless drywall. However, it’s important to ensure the drywall is properly prepared, including the application of a suitable primer, to achieve a smooth and durable paint finish.
How do you fix drywall textures?
Fixing drywall textures typically involves applying joint compounds with various techniques, such as using a texture brush, roller, or sprayer. By matching the existing texture pattern, you can effectively repair and blend the repaired area with the rest of the wall.
Conclusion
In this article, we have discussed the common causes of drywall paper peeling and Proven techniques for achieving professional-looking paper repairs on drywall. We started by assessing the damage and preparing for repair.
Then we removed the loose paper, smoothed out the edges, applied joint compound, and applied new paper using wallpaper paste or joint compound. We finished sanding down rough spots and painting over the repaired spot. Emphasis on the long-term durability of paper repairs on drywall.
It is important to note that proper preparation and finishing are essential for long-lasting repairs on drywall. Without these steps, your patching and blending techniques for peeling drywall paper will not be as effective. You might find yourself repairing loose paper on your drywall again in no time.
One way to ensure the long-term durability of your repair is to use high-quality materials such as paint and primer. Investing in good quality tools like putty knives will also make a difference in the results you achieve. The importance of preventive measures for minimizing paper peeling on drywall.
As important as it is to know how to repair peeling wallpaper on drywall, it’s also critical to take preventive measures to minimize future damage. Common causes of peeling paper on drywall include moisture buildup from humidity or water leaks, improper installation methods, or lack of maintenance.
To prevent moisture buildup from happening again, consider installing a dehumidifier or increasing ventilation in the affected area. Ensure that your surfaces are thoroughly cleaned before applying wallpaper paste or joint compound by removing any dust or debris that may have accumulated over time. An optimistic spin
Although fixing peeling drywall paper can be frustrating at times, mastering it with the help of an instructional guide such as this one can lead to a sense of accomplishment like no other. With the right tools, materials, and techniques, you can become an expert at repairing drywall paper peeling.
Overall, it’s important to take your time and follow easy-to-follow instructions for patching and blending peeling drywall paper. By doing so, you’ll achieve a seamless repair that will last for years to come.