The Importance of Textured Drywall in Home Decor
Textured drywall is a popular decorative feature in many homes. It adds depth and character to a room and creates an interesting visual effect. Texture can also help hide imperfections or blemishes on the walls, making it particularly useful for older homes or those with uneven surfaces.
In addition to its aesthetic appeal, textured drywall also serves practical purposes. It can help absorb sound and improve acoustics in a room, making it perfect for home theaters or music rooms.
But all too often, textured drywall becomes damaged and needs repair. Common causes of damage include moisture, impact from furniture or other objects, settling of the foundation, or simply wear and tear over time.
Learn how to repair textured drywall like a pro! Our comprehensive guide covers everything you need to know to get the job done right.
Common Causes of Damage to Textured Drywall
Moisture is perhaps the most common cause of damage to textured drywall. Over time, moisture can seep into the wall and cause the texture to loosen or bubble up. This can lead to peeling paint or even mold growth if left unchecked.
Furniture and other objects bumping against walls can also cause damage to textured drywall. Small dents and scratches may not be immediately noticeable but can become more obvious over time as they accumulate.
Settling the foundation is another common culprit in textured drywall damage. As the house shifts slightly over time due to soil movement or settling, cracks may appear on walls that were previously smooth and unblemished.
An Overview of the Repair Process
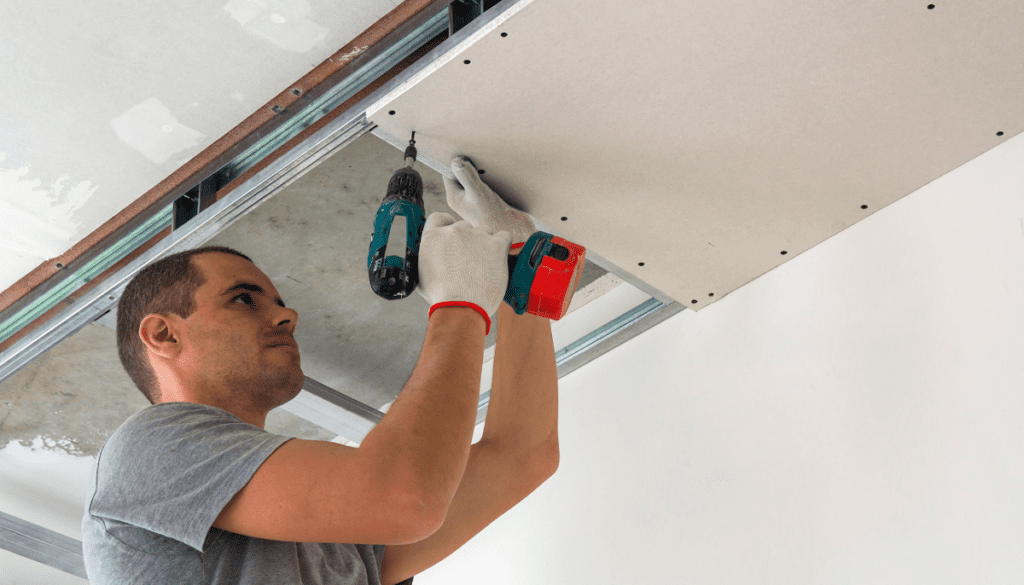
Repairing textured drywall requires some specialized tools and techniques but is generally a straightforward process that many homeowners can tackle themselves with some patience and attention to detail. The first step is assessing the damage by inspecting the area carefully for cracks, holes, or other imperfections that will need patching. Once the extent of the damage is determined, it’s time to prepare for repair by gathering tools and materials such as joint compound, sandpaper, trowel or putty knife, texture spray can or hopper gun, and paint and primer.
The repair process itself involves applying a joint compound to fill in cracks and holes, sanding down rough edges once the compound has dried thoroughly, applying a texture spray can or hopper gun to match the existing texture as closely as possible, and finally painting over the repaired area with primer and paint. With a bit of practice and some patience, homeowners can achieve professional-looking repairs that blend seamlessly into their existing walls.
Assessing the Damage
Inspecting the Damaged Area
The first step in repairing textured drywall is to inspect the damaged area. This will help you determine the extent of the damage and what needs to be done to fix it. Make sure to carefully analyze every inch of the damaged surface and take note of all cracks, holes, or other types of damage.
Determining the Extent of the Damage
Once you have inspected the damaged area, you need to determine how severe it is. Most cracks or holes can be fixed with a little joint compound and texture spray can. However, if there is severe damage, such as water damage or mold growth, more extensive repairs may be necessary.
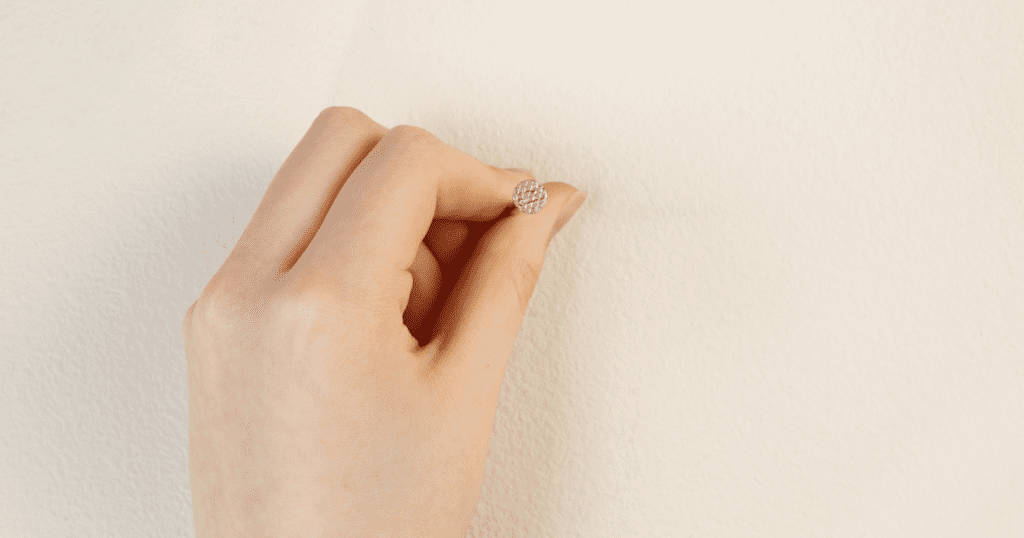
Identifying the Type of Texture
It’s essential to identify what type of texture your wall has before starting any repair work. If you’re unsure about this, consult a professional for advice on how best to proceed. The texture on your wall could be anything from a light orange peel texture to a heavy knockdown texture.
Matching existing wall texture can be challenging and may require some experimentation with different nozzle sizes and pressure settings when applying joint compound or texture spray can. Applying drywall texture takes skill and patience, so if you’re not confident with DIY home improvements, it’s best to leave it to professionals.
Can You Repair Textured Walls?
Yes, textured walls can be repaired with a joint compound and a new coat of paint after patching up any visible defects or imperfections. Texture application tips include using unique patterns like swirls or stucco finishes that mimic natural materials such as brickwork for an enhanced aesthetic appeal. Remember that restoring wall texture requires plenty of patience when applying drywall mud because applying too much mud might cause cracking over time due to shrinkage during drying periods between coats.
Drywall Patching Tips
A common drywall texture style is the knockdown texturing technique, which involves spraying joint compound and then knocking it down with a trowel to create a unique pattern. When trying to match wall texture, it’s best to practice on a spare piece of drywall before applying it to the damaged area.
Preparing drywall for texture requires taping and mudding before sanding down the wall surface. Sandpaper grit size varies between 220-320 depending on how smooth you want your walls to be; higher grits result in smoother walls but take longer.
Overall, these steps to repair textured drywall can be time-consuming, but taking proper care of your home’s interior walls is essential for long-term maintenance. DIY textured drywall repair can save you money if done correctly or needs professional help when in doubt for consistent results.
Preparing for Repair
Gathering Necessary Tools and Materials
When it comes to repairing textured drywall, having the right tools is key. You don’t want to be halfway through a repair only to realize you’re missing a crucial item. Make sure you have all the necessary tools and materials on hand before starting your repair.
- The first item on your list should be a joint compound. This will be used to fill in any cracks or holes in the drywall. Don’t skimp on quality here – investing in a good joint compound will ensure a better finish.
- Next up is sandpaper. You’ll need this to smooth down rough edges and excess joint compound once it’s dried.
- If you’re dealing with a large area, consider purchasing an electric sander to make the job easier.
- A trowel or putty knife is also essential for applying joint compound evenly and smoothly. Choose one that feels comfortable in your hand and has a sturdy blade.
- If you’re dealing with larger repairs or want to match an existing texture, a texture spray can or hopper gun is worth considering. These tools allow you to apply texture quickly and easily.
- Don’t forget about the paint and primer! You’ll need these to finish off your repair and match the color of your existing walls.
Clearing the Area Around Damaged Drywall
Before starting any repairs, it’s important to clear the area around the damaged drywall. Move furniture out of the way and lay down drop cloths or plastic sheeting to protect floors and other surfaces from dust and debris. If possible, cover nearby vents or use fans to redirect airflow away from the work area.
This will help prevent dust from spreading throughout your home. Once everything is cleared out of the way, take some time to thoroughly inspect the damaged area before beginning repairs.
Look for any signs of moisture or mold, as these issues will need to be addressed before you can proceed with your repair. When preparing for textured drywall repairs, it’s important to have the right tools on hand and to clear the area around the damaged drywall.
Taking these steps will ensure a smoother repair process and a better finish in the end. Don’t rush through this step – taking your time now will save you headaches down the road.
Repairing Textured Drywall
Applying Joint Compound to Fill in Cracks and Holes
Drywall patching and texturing can be a daunting task, but fear not! With the right tools and techniques, you can make your damaged textured drywall look as good as new. The first step is to apply a joint compound to fill in any cracks or holes.
Using a trowel or putty knife, carefully apply the joint compound over the damaged area, making sure to spread it evenly. But remember, patience is key when it comes to applying joint compound.
Don’t rush the process! Allow the joint compound to dry completely before sanding down any rough edges or excess material.
Sanding Down Rough Edges and Excess Joint Compound
Once your joint compound has dried fully, it’s time to sand down any rough edges or excess material. Use fine-grit sandpaper for this process, making sure not to apply too much pressure that could damage surrounding areas of your wall. Drywall patching tips include using circular motions when sanding, which helps blend the patched area with the surrounding texture.
You don’t want an obvious blemish on your wall after all that hard work! Take your time with this step until you achieve a smooth texture on your repaired area.
Applying Texture Spray Can or Hopper Gun to Match Existing Texture
One of the most challenging parts of DIY textured drywall repair is matching the existing wall texture. Luckily there are tools available, like texture spray cans and hopper guns, that can help recreate different types of wall textures. When using these tools for repairing a textured wall, it’s essential first to experiment with different nozzle sizes and pressure settings before application.
Test on a small patch before applying texture spray evenly over the entire area. Matching existing wall texture takes practice, so don’t get discouraged if it takes a few tries to get it right.
Painting Over Repaired Area With Primer and Paint
Once your textured drywall has been fully repaired, it’s time to paint over the area with primer and paint. Restoring wall texture is not just about repairing the blemishes but also making sure the area matches the surrounding wall in both texture and color. Matching drywall texture includes selecting the right type of primer and paint that will ensure an exact match.
Don’t skimp on quality; investing in a good drywall repair kit can make a significant difference in achieving professional-looking results for your DIY home improvements. So fear not, with these techniques for repairing textured walls, you can easily fix any imperfections in your walls without calling an expensive professional!
Frequently Asked Questions
What is the best way to patch textured drywall?
The best way to patch textured drywall involves first applying a patch piece of drywall, taping and mudding the seams, and then applying a texture to match the surrounding wall. It’s important to let each layer of mud dry completely and sand between applications to ensure a smooth finish before texturing.
How do you fix damaged wall texture?
Fixing damaged wall texture typically involves sanding down the damaged area, applying a new layer of joint compound or texture material, and then replicating the existing texture with a texture brush or sponge. It may take some practice to get a perfect match.
How do you fix a textured hole in drywall?
To fix a textured hole in drywall, you first need to patch the hole with a new piece of drywall, tape, mud the seams, sand it smooth, and then apply a matching texture over the repaired area. Matching the texture may require a specific tool or technique depending on the style of the texture.
How do you match texture after drywall repair?
Matching texture after drywall repair requires you to closely observe and replicate the existing texture style. This can be done by using texturing brushes, sponges, or specific spray products, and it often involves some trial and error to get a perfect match.
How do you fill holes in textured walls?
To fill holes in textured walls, you’ll need to apply a patch if the hole is large or a joint compound if it’s small, and then recreate the texture over the repaired area. Again, the recreation of the texture will depend on the original texture style and may require specialized tools.
How do you professionally patch drywall?
Professionally patching drywall involves first cutting out the damaged area, then attaching a new piece of drywall using screws, covering the seams with drywall tape and joint compound, sanding it smooth, and finally priming and painting the repaired area. Ensuring a smooth finish and matching the existing wall texture is key to a professional-looking repair.
Conclusion
Key Takeaways from Repairing Textured Drywall
In review, repairing textured drywall involves several steps that must be taken in sequence to achieve the best results. Before starting any repair work, it is necessary to assess the damage thoroughly and prepare for repair by gathering the appropriate tools and materials. Once you have done this, you can begin the repair process by applying joint compound to fill in cracks and holes, sanding down rough edges, applying texture spray can or hopper gun to match the existing texture, and painting over the repaired area with primer and paint.
Tips for Maintaining Textured Drywall in Good Condition
After completing any necessary repairs on your textured drywall, it is essential to take steps to maintain its condition going forward. One tip for doing this is to avoid placing heavy objects against walls that might cause them to crack or crumble over time.
Another tip is to avoid exposing walls to excess moisture or humidity, as this can lead to mold growth and other unwanted issues. To protect your textured drywall from damage caused by everyday wear and tear, it’s also a good idea always to keep your home well-maintained.
This may involve regular cleaning of surfaces, checking for signs of water damage or leaks around pipes and faucets, as well as taking care when moving furniture or other objects around so as not accidentally scratch or dent walls. Repairing textured drywall may seem daunting at first, but with the proper tools and techniques, anyone can do it themselves at home.
By following these steps closely – assessing the damage thoroughly; preparing adequately before beginning repairs; applying joint compound correctly; sanding down rough edges carefully; matching existing wall texture; painting over repaired areas with paint – you’ll be able to restore even severely damaged walls back their former glory! And don’t forget these maintenance tips: avoid placing heavy objects against walls, protect walls from moisture damage, and keep your home well-maintained to prevent everyday wear and tear.